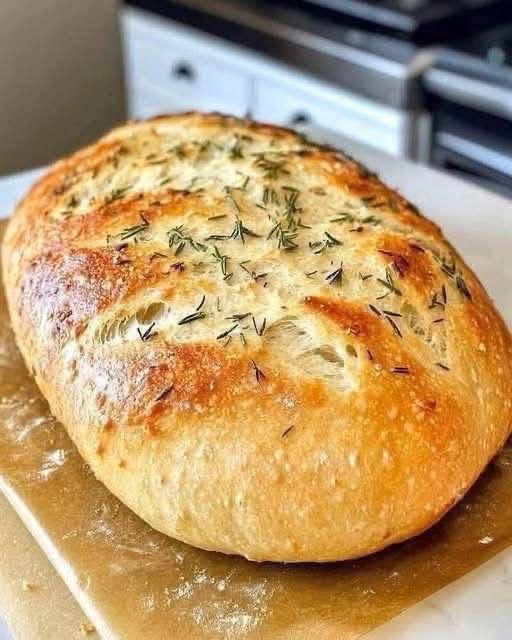
Imagine the crisp, shattering crust of a bakery-quality loaf, the soft, hole-ridden interior perfumed with roasted garlic and herbs, and the irresistible aroma that will bring everyone into your kitchen. Now, imagine achieving it all without any kneading, fancy equipment, or baking stress. This Sourdough No-Knead Garlic Bread is your gateway to easy artisan baking at home, a foolproof bread recipe that delivers stunning results with breathtaking simplicity. If you maintain a sourdough starter, this recipe is about to become your new favorite way to create a show-stopping side dish, a homemade bread that elevates every soup, salad, and pasta night into a special occasion.
The magic of the no-knead method lies in time, not muscle. A long, slow fermentation—fueled by your active sourdough starter—develops incredible depth of flavor and that dreamy, open crumb, all while the gluten organizes itself. Infusing this process with roasted garlic and herbs from the very beginning creates a loaf where every single bite is imbued with savory flavor. This is the perfect make-ahead bread recipe, a beginner sourdough bake with guaranteed results, and the ultimate answer to what to do with sourdough discard. Let’s unlock the secrets to this effortlessly impressive bake.
Why This No-Knead Sourdough Garlic Bread Works
This recipe is a masterpiece of minimal effort and maximum return. It bypasses the common pain points of traditional bread making: there’s no need for a stand mixer, no precise kneading windows, and no fear of over-handling. By combining a high-hydration dough (which means a wetter dough that creates those beautiful air pockets) with a long, slow bulk fermentation, we allow natural enzymes and wild yeast to do all the work. The addition of roasted garlic and olive oil does not significantly hinder the rise; instead, it adds fat and flavor that integrate seamlessly during the extended rest.
This method is incredibly forgiving, making it the ideal weekend baking project or even a schedule-it-and-forget-it bread you can start one evening for baking the next day. The result? A loaf with a crisp, blistered crust, a soft, tangy, and garlicky interior, and the kind of homemade pride that can’t be bought.
Sourdough No-Knead Garlic Bread: Ingredients & The Science of Substitutions
Here is everything you need. The short list is a hallmark of great artisan baking.
For the Dough:
· 500g (about 4 cups) bread flour (see notes below)
· 350g (1 ½ cups) lukewarm water
· 100g (½ cup) active, bubbly sourdough starter (100% hydration)
· 9g (1 ½ tsp) fine sea salt
· 1 whole head of garlic, roasted
· 2-3 tbsp high-quality olive oil, plus more for coating
· 2 tbsp fresh rosemary or thyme, finely chopped (or 2 tsp dried)
For Topping (Optional but Recommended):
· Flaky sea salt (like Maldon)
· Freshly cracked black pepper
· Extra fresh herbs
Ingredient Deep Dive: Choosing Your Champions
Flour: Bread flour is highly recommended for its higher protein content (12-14%), which provides the necessary gluten strength to support the wet dough and create those iconic irregular holes. For a slightly more tender crumb, you can use all-purpose flour, but the rise may be slightly less dramatic. For a whole wheat sourdough version, substitute up to 50% of the bread flour with whole wheat flour, but be prepared for a denser, heartier loaf and consider adding 1-2 extra tablespoons of water.
The Starter: This recipe calls for active, bubbly sourdough starter that has been fed 4-12 hours prior and is at or just past its peak. Using starter at its peak ensures maximum leavening power. This is not a recipe for inactive discard, as it provides the primary lift. If your starter isn’t active, your bread won’t rise properly.
The Garlic: Roasting the garlic is non-negotiable. Raw garlic is too pungent and can inhibit yeast activity. Roasting mellows the flavor into a sweet, nutty, spreadable paste that incorporates perfectly.
Pro Tip for Roasting:Slice the top off a whole garlic head to expose the cloves. Drizzle with olive oil, wrap in foil, and bake at 400°F (200°C) for 35-40 minutes until soft and golden. Let cool, then squeeze the cloves out.
Herbs & Fat: Olive oil enriches the dough, contributing to a more tender crumb and a gorgeous golden crust. Fresh herbs provide vibrant, aromatic notes. Dried herbs work in a pinch but use half the amount.
Essential Tools for No-Knead Success
A Digital Kitchen Scale: This is the single most important tool for consistent, foolproof baking. Measuring by weight (grams) is infinitely more accurate than cups.
A Large Mixing Bowl: For the initial mix and the long fermentation.
A Dutch Oven (or heavy lidded pot): This is the secret to the professional crust. It traps steam from the dough, creating a humid micro-oven that allows the loaf to expand fully before the crust sets. A 5-7 quart size is perfect.
Bowl Scraper or Silicone Spatula: For easily handling the sticky dough.
Parchment Paper: For safely lowering the dough into the hot Dutch oven.
Sharp Razor Blade or Lame: For scoring the dough, which allows controlled expansion in the oven.
Step-by-Step Instructions: The Path to Perfect Bread
Day 1: The Evening Mix (5 Minutes of Active Time)
Roast Your Garlic: Prepare your roasted garlic as described above. Once cool, squeeze the soft cloves into a small bowl, add the 2-3 tbsp olive oil and chopped herbs, and mash into a rough paste.
Combine: In your large mixing bowl, whisk together the bread flour and salt. In a separate bowl or measuring jug, combine the lukewarm water and active sourdough starter. Stir until the starter is mostly dissolved.
The Autolyse (Optional but Beneficial): Pour the starter-water mixture into the flour. Use your bowl scraper or spatula to mix until there are no dry bits of flour left. The dough will be shaggy and sticky. Cover the bowl with a damp kitchen towel or plastic wrap and let it rest for 30 minutes. This autolyse allows the flour to fully hydrate and starts gluten development effortlessly.
Incorporate Flavor: After the rest, add the roasted garlic and herb paste to the shaggy dough. Use your scraper to fold and turn the dough in the bowl until the garlic paste is mostly incorporated. It will be messy and slippery—that’s fine.
The Long Fermentation: Cover the bowl tightly with plastic wrap or a lid. Let it sit at room temperature (ideally 68-75°F or 20-24°C) for 12-14 hours, or overnight. The dough is ready when it has risen significantly (often 1.5-2x), is covered in bubbles, and has a domed, slightly jiggly surface.
Day 2: Shape, Proof, and Bake
Shape the Loaf (Gentle!): Generously flour a work surface. Using your bowl scraper, gently scrape the very wet, bubbly dough out onto the flour. With floured hands, perform a series of “envelope folds”: gently stretch the left side of the dough and fold it into the center. Repeat with the right side, then the top, then the bottom. This builds structure without degassing it completely.
The Second Proof: Heavily dust a proofing basket (banneton) or a medium bowl (lined with a clean, floured kitchen towel) with rice flour or all-purpose flour. Place the shaped dough seam-side up into the basket. Cover loosely and let it proof at room temperature for 1-2 hours. Alternatively, for more flexibility, you can refrigerate this second proof for 4-12 hours (this develops even more sour flavor). The dough is ready when it looks puffy and passes the “poke test”: gently poke it; if the indentation springs back slowly and partially, it’s ready. If it springs back quickly, it needs more time. If it doesn’t spring back at all, it’s over-proofed (but still bakeable!).
Preheat & Prep: At least 30 minutes before baking, place your Dutch oven (with its lid on) into your oven and preheat to 450°F (230°C). You want the pot screaming hot.
Score and Bake: Carefully remove the hot Dutch oven. Place a sheet of parchment paper over your proofing basket, flip it over, and gently lower the dough (now seam-side down) onto the parchment. Use your razor blade to make one confident, deep slash (about ½ inch) down the center of the loaf—this is your “ear” that will open beautifully.
The Steam Bake: Using the parchment as a sling, carefully lower the dough into the hot Dutch oven. Put the lid back on. This creates the essential steam.
Bake Covered: Bake with the lid on for 30 minutes. This period of trapped steam is crucial for optimal oven spring and crust development.
Bake Uncovered: After 30 minutes, carefully remove the lid. The loaf will be pale and have risen dramatically. Continue baking, uncovered, for another 20-25 minutes, until the crust is a deep, glorious, golden brown and sounds hollow when tapped on the bottom. An internal temperature of 208-210°F (98-99°C) confirms it’s done.
Cool (The Hardest Step): Transfer the loaf to a wire cooling rack. Let it cool completely for at least 2-3 hours before slicing. The interior is still cooking and setting during this time. Slicing too early will result in a gummy crumb.
The Food Science: Why No-Knead Works So Well
The “no-knead” revolution, popularized by Jim Lahey, hinges on two scientific principles: autolysis and long fermentation.
· Autolysis: The initial rest period (even just 30 minutes) after mixing flour and water allows enzymes to break down starches into sugars and begin organizing gluten strands by themselves. This means less work for you and a more extensible, elastic dough.
· Long Fermentation: The 12+ hour bulk ferment gives the wild yeast and lactic acid bacteria in your sourdough starter ample time to work. They produce gas (for rise) and organic acids (for that signature tangy flavor and improved gluten structure). The slow process allows flavors to develop that are impossible in a quick, commercial-yeast bread. The high hydration (70% in this recipe) is manageable because the long fermentation develops a strong gluten network that can hold the water, leading to an exceptionally open and moist crumb.
Serving, Pairing & The Art of the Leftover Slice
This bread is a star on its own, slathered with good butter or dipped in olive oil and balsamic vinegar.
· The Ultimate Soup Companion: It’s the perfect homemade bread for soup, especially with tomato soup, a hearty stew, or French onion soup.
· Pasta Night Hero: Serve thick slices alongside any pasta dish to soak up every last bit of sauce.
· Charcuterie Board Essential: A rustic slice elevates any cheese and meat board.
· Next-Day Brilliance: Stale bread? Make the best sourdough croutons or garlic bread strata (a savory bread pudding). For croutons, cube, toss with olive oil, salt, and garlic powder, and bake at 375°F until crisp.
Storage & Reheating for Lasting Perfection
· Storage: Once completely cool, store the loaf cut-side down on a cutting board for up to 2 days for optimal crust texture. For longer storage (up to 5 days), place it in a paper bag, then inside a plastic bag, left slightly open. Avoid airtight containers at room temp, as they soften the crust.
· Freezing: This bread freezes excellently. Wrap the whole loaf or individual slices tightly in plastic wrap and then foil. Freeze for up to 3 months. Thaw at room temperature.
· Reheating: To revive the crackling crust, place a slice or the whole loaf directly on the oven rack at 350°F for 5-10 minutes. For a single slice, a toaster works wonders.
Dietary Customizations & Troubleshooting FAQ
Can I make this without a Dutch oven?
Yes,but the crust will be different. Bake on a preheated pizza stone or baking sheet, and create steam by placing a pan of boiling water on the bottom oven rack for the first 20 minutes of baking.
My dough didn’t rise much overnight. What happened?
Your starter likely wasn’t active enough,or your kitchen was too cold. Next time, ensure your starter floats in water before using, or let the dough ferment in a slightly warmer spot (like an oven with the light on).
The dough is too sticky to handle!
This is normal.Use wet or floured hands and a dough scraper. Resist adding more flour, as it will compromise the open crumb. Confidence comes with practice.
How can I make this vegan?
It already is!This sourdough bread contains no dairy or eggs. Just ensure your starter was created with just flour and water.
Can I add cheese?
Absolutely.Adding ½ cup of finely grated parmesan or sharp cheddar to the dry ingredients is fantastic. For a decadent twist, fold in ½ cup of cubed mozzarella or gruyère during the shaping step.
Conclusion: Your Journey to Fearless Bread Baking
This Sourdough No-Knead Garlic Bread is more than a recipe—it’s an invitation to experience the rhythm and reward of slow, mindful baking. It demystifies the process of creating exceptional, flavorful bread and places it squarely in the realm of the achievable home cook. The waiting period is not idle time; it’s where the magic happens, transforming simple ingredients into a complex, aromatic, soul-satisfying loaf.
So, feed your starter, roast that garlic, and embrace the ease. The reward is a warm, crackling slice of pure comfort, the knowledge that you can create bakery-level bread, and the undeniable joy of sharing something made with patience and care.
Did you bake this loaf? We’d love to see your beautiful creation! Share your photos and tag #NoKneadGarlicBread on Instagram. And if you have questions, drop them in the comments below—our baking community is here to help!
Printable Recipe Card: Sourdough No-Knead Garlic Bread
Prep Time: 30 mins (active) | Fermentation: 14-18 hrs | Bake Time: 50-55 mins | Total Time: 15+ hrs | Yield: 1 large loaf
Ingredients:
· 500g bread flour
· 350g lukewarm water
· 100g active sourdough starter
· 9g fine sea salt
· 1 head roasted garlic, mashed
· 2-3 tbsp olive oil + herbs
· Flaky salt & pepper (for topping)
Instructions:
- Mix (Night Before): Whisk flour & salt. Combine water & starter; add to flour. Mix until no dry flour remains. Rest 30 mins. Add garlic-herb paste; incorporate. Cover bowl. Ferment 12-14 hrs at room temp.
- Shape (Next Day): Flour surface. Gently fold dough into a round. Place seam-side up in floured banneton. Proof 1-2 hrs at room temp (or 4-12 hrs in fridge).
- Bake: Preheat Dutch oven at 450°F for 30 mins. Turn dough onto parchment, score. Bake covered for 30 mins. Uncover, bake 20-25 mins until deep golden. Internal temp should reach 210°F.
- Cool: Cool completely on wire rack for 2-3 hrs before slicing.
More Recipes You Might Like
-

Cheesy Potato Patties 😋 – Crispy, Golden, and Irresistibly Cheesy If you’re looking for a high-RPM comfort food recipe that gets clicks, saves, and repeat cooks, Cheesy Potato Patties are a guaranteed winner. Crispy on the outside, soft and fluffy on the inside, and loaded with melty cheese—this recipe checks every box readers love: easy…
-

Brown Sugar Pineapple Ham Bake 😋 – The Ultimate Sweet & Savory Comfort Dish If you’re searching for a high-RPM, comfort-food recipe that people love clicking, saving, and cooking again and again, this Brown Sugar Pineapple Ham Bake is it. Sweet, sticky brown sugar. Juicy pineapple. Tender, savory ham. Baked together into one irresistible dish…
-

Angel Chicken Pasta – The Creamy Comfort Food That Everyone Loves
Few dishes feel as comforting, indulgent, and crowd-pleasing as Angel Chicken Pasta. This creamy, slow-cooked chicken pasta recipe has earned its name because it’s truly heavenly—rich, velvety sauce, tender chicken, and perfectly cooked pasta all coming together in one unforgettable meal. Angel Chicken Pasta is one of those recipes that never goes out of style.…