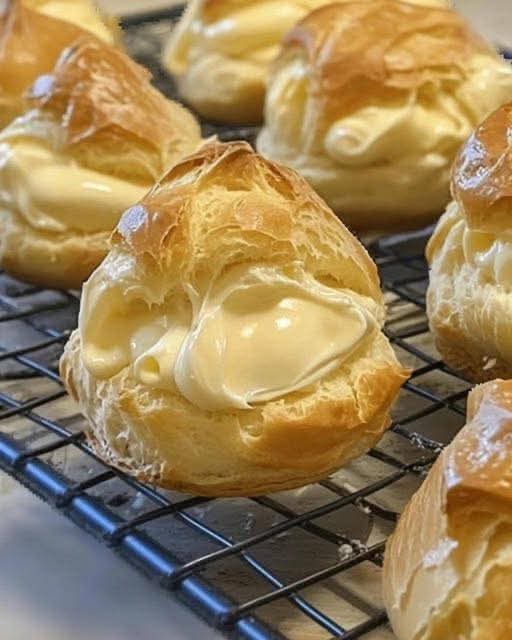
There is a certain magic to patisserie—a world where flour, butter, eggs, and cream are transformed into edible elegance. And standing proudly in the center of that world is the cream puff. Or as the French call it, choux à la crème. These are not mere desserts; they are tiny, edible clouds. Imagine a shell so ethereally crisp and golden it shatters at the slightest pressure, giving way to an airy, hollow interior that cradles a lavish pool of silken, vanilla-specked custard. This is the perfect cream puff: a symphony of texture and taste that balances delicate crispness with luxuriously cool, creamy filling.
For many home bakers, the idea of making choux pastry from scratch feels intimidating, reserved for pastry chefs in starched whites. Let this be your guide to demystifying that process. With understanding and a bit of courage, you can create these classic French pastries in your own kitchen. This comprehensive guide will walk you through every critical step—from cooking the dough to piping the perfect filling—ensuring your homemade cream puffs are nothing short of spectacular. Prepare to unlock the secrets of the patisserie case and bring a touch of Parisian flair to your table.
The Anatomy of a Perfect Cream Puff: Why This Recipe Works
Understanding the “why” behind the steps is your key to consistent success. Choux pastry is a unique creature; it’s twice-cooked and relies on steam for its legendary rise.
· The Cooked Flour Paste: Water, butter, and flour are cooked together first. This gelatinizes the starch in the flour, allowing it to absorb more liquid (the eggs) and create a thick paste that holds its shape.
· The Power of Steam: When the high-moisture dough hits a hot oven, the water turns to steam. The eggs and gluten structure stretch to contain it, creating the signature large, hollow interior. A burst of initial high heat is crucial for maximum “oven spring.”
· The Custard Filling (Crème Pâtissière): This is not just pudding. A proper pastry cream is thickened with egg yolks and cornstarch or flour, creating a sturdy, flavorful filling that won’t weep or make the shell soggy. It’s cooked to perfection for a lush, spoon-standingly thick consistency.
· Texture Contrast: The final product is a study in contrasts: a crisp, dry shell against a cool, soft, creamy interior. This interplay is what makes each bite so compelling.
Cream Puffs with Custard Filling: The Complete Recipe
Prep Time: 45 minutes | Cook Time: 30-35 minutes (plus custard chill) | Total Time: About 3 hours (including cooling) | Yield: 20-24 medium cream puffs
Ingredients:
For the Choux Pastry (Pâte à Choux):
· 1 cup (240ml) water
· ½ cup (1 stick / 113g) unsalted butter, cut into pieces
· 1 teaspoon granulated sugar
· ½ teaspoon fine sea salt
· 1 cup (125g) all-purpose flour, sifted
· 4 large eggs, at room temperature
For the Vanilla Pastry Cream (Crème Pâtissière):
· 2 cups (480ml) whole milk
· ½ cup (100g) granulated sugar
· ¼ cup (30g) cornstarch
· ¼ teaspoon fine sea salt
· 4 large egg yolks
· 2 tablespoons unsalted butter, cubed
· 1 ½ teaspoons pure vanilla extract (or ½ a vanilla bean, seeds scraped)
For Finishing (Optional):
· Powdered sugar for dusting
· Chocolate ganache for dipping
Step-by-Step Instructions:
Part 1: Make the Pastry Cream (Do this first so it can chill.)
Heat the Milk: In a medium saucepan, heat the milk (and vanilla bean pod and seeds, if using) over medium heat until it just begins to simmer. Remove from heat.
Whisk Yolks and Dry Ingredients: In a separate medium bowl, whisk the egg yolks, sugar, cornstarch, and salt until very smooth and pale yellow.
Temper the Eggs: While whisking the yolk mixture constantly, slowly drizzle in about ½ cup of the hot milk. This gently raises the eggs’ temperature without scrambling them.
Combine and Cook: Pour the tempered yolk mixture back into the saucepan with the remaining milk. Cook over medium heat, whisking constantly and vigorously, especially in the corners, until the mixture thickens dramatically and large bubbles break the surface for a full 1-2 minutes. This cooks out the cornstarch taste.
Finish: Remove from heat. Whisk in the butter and vanilla extract (if using). Immediately strain through a fine-mesh sieve into a clean bowl to ensure perfect smoothness.
Chill: Press plastic wrap directly onto the surface of the cream to prevent a skin from forming. Refrigerate for at least 2 hours, or until completely cold and firm.
Part 2: Make the Choux Pastry Shells
Preheat and Prep: Preheat your oven to 425°F (220°C). Line two large baking sheets with parchment paper.
Cook the Butter and Water: In a medium saucepan, combine water, butter, sugar, and salt. Bring to a rolling boil over medium-high heat, ensuring the butter is fully melted.
Add the Flour: Reduce heat to low. Add the sifted flour all at once. Immediately stir vigorously with a wooden spoon. The mixture will form a ball and pull away from the sides of the pan. Continue to cook, stirring, for about 1-2 minutes to dry the paste slightly. A thin film will form on the bottom of the pan.
Cool the Dough: Transfer the hot dough to the bowl of a stand mixer. Let it cool for 5-7 minutes, until it’s just warm to the touch (not hot enough to cook the eggs).
Add the Eggs: Using the paddle attachment, mix on medium-low speed to release more heat. Add the eggs one at a time, mixing on medium speed until each egg is fully incorporated before adding the next. The dough will go from slippery to smooth. After the last egg, mix for another 30-60 seconds until the dough is glossy, thick, and holds a “V” shape when the paddle is lifted.
Pipe the Shells: Fit a large piping bag with a ½-inch round tip (Ateco #806 or similar). Fill with dough. Pipe 1.5-inch diameter mounds, spacing them 2 inches apart. Dip a finger in water and gently smooth down any pointed peaks.
Bake: Place sheets in the oven. Bake at 425°F for 10 minutes, then without opening the door, reduce temperature to 350°F (175°C). Bake for 20-25 more minutes, until puffs are deeply golden brown, firm, and sound hollow when tapped. Do not open the oven early, or they may collapse.
Dry Out: Turn off the oven. Poke each puff with a paring knife or toothpick to release steam. Leave them in the turned-off oven with the door slightly ajar for 20-30 minutes to dry out completely. Transfer to a wire rack to cool.
Part 3: Fill and Assemble
Whip the Cream (Optional): For a lighter filling, you can fold 1 cup of softly whipped heavy cream into the chilled pastry cream until smooth.
Fill the Puffs: Fit a piping bag with a small round tip (like Ateco #230) or a bismarck tip. Fill with the chilled pastry cream. Insert the tip into the hole you made to vent steam (or pierce the bottom) and gently pipe until the puff feels heavy and the filling just begins to seep out.
Serve: Dust with powdered sugar or dip the tops in melted chocolate ganache. Serve immediately, or refrigerate for up to 4 hours.
Baker’s Pro-Tips for Foolproof Cream Puffs
· Room Temperature Eggs are Non-Negotiable: They incorporate more easily and evenly into the dough, which is critical for proper texture.
· Cook the Dough Thoroughly: The step of cooking the flour paste on the stove is essential for removing excess moisture and gelatinizing the starch. Don’t rush it.
· The “V” Test: The dough should fall from the beater in a thick, slow-moving ribbon that holds a “V” shape for a moment. This is your visual cue that the consistency is perfect.
· No Peeking! The initial blast of high heat creates steam for the rise. Opening the oven door releases that steam and can cause catastrophic collapse.
· Dry Completely: The final drying step in the turned-off oven is what gives you a crisp shell that stays crisp longer. Skipping this leads to soggy puffs.
Flavor Variations & Elevations
· Chocolate Choux: Add 2 tbsp of cocoa powder to the flour when making the dough.
· Coffee Custard: Infuse the milk with 2 tbsp of instant espresso or finely ground coffee.
· Chocolate Pastry Cream: Whisk 4 oz of melted and cooled bittersweet chocolate into the finished, hot pastry cream.
· Chantilly Cream Filling: Fill with sweetened whipped cream flavored with vanilla or liqueur.
· Paris-Brest: Pipe the dough into a large ring, top with sliced almonds, and fill with praline-flavored cream.
· Savory Gougères: Omit the sugar from the dough and add 1 cup of grated Gruyère cheese before the eggs. Omit the custard filling.
Storing and Make-Ahead Instructions
· Unfilled Shells: Once completely cooled, store in an airtight container at room temperature for 1 day, or freeze for up to 1 month. Recrisp in a 300°F oven for 5 minutes before filling.
· Pastry Cream: Can be made up to 3 days in advance and kept tightly covered in the refrigerator.
· Filled Puffs: Are best served the day they are filled. If necessary, refrigerate for up to 4 hours. The shells will slowly soften.
Frequently Asked Questions (FAQ)
Q: Why did my cream puffs collapse?
A:The most common reasons are: underbaking (shells weren’t set), opening the oven door too early, or not releasing the steam after baking. Ensure they are deep golden brown and follow the no-peek rule.
Q: Can I make the dough by hand?
A:Yes, absolutely. Use a sturdy wooden spoon to incorporate the eggs. It will require some arm strength, but it’s very doable.
Q: My pastry cream is lumpy. Can I fix it?
A:If it’s slightly lumpy from overcooked egg, straining it through a sieve will save it. To prevent lumps, ensure constant, vigorous whisking during cooking and proper tempering.
Q: How do I prevent soggy bottoms?
A:Cool the puffs completely on a wire rack so condensation doesn’t form underneath. Fill them as close to serving time as possible.
Q: Can I use this recipe for éclairs?
A:Yes! This is the same choux pastry. Simply pipe 4-inch lines instead of mounds. Baking time may be slightly longer.
The Final Bite: Your Patisserie Journey Awaits
Mastering cream puffs is a rite of passage for any serious home baker. It’s a lesson in precision, patience, and the beautiful science of baking. The moment you pull a tray of perfectly puffed, golden shells from your oven, you’ll feel a profound sense of accomplishment. And the first bite of your homemade creation—crisp shell yielding to rich, cool custard—will convince you that every step was worth it.
So, gather your ingredients, arm yourself with your whisk, and approach your oven with confidence. You are not just making dessert; you are crafting edible artistry, one perfect puff at a time.
Now it’s your turn to create a little magic! Have you made choux pastry before? What’s your favorite filling? Share your stories, photos, and tips in the comments below!
P.S. Know a fellow baker who’s ready for a delightful challenge? Share this guide with them! And for more classic, from-scratch baking projects, subscribe to get our latest recipes and tutorials delivered straight to your inbox. Happy baking
More Recipes You Might Like
-

Cheesy Potato Patties 😋 – Crispy, Golden, and Irresistibly Cheesy If you’re looking for a high-RPM comfort food recipe that gets clicks, saves, and repeat cooks, Cheesy Potato Patties are a guaranteed winner. Crispy on the outside, soft and fluffy on the inside, and loaded with melty cheese—this recipe checks every box readers love: easy…
-

Brown Sugar Pineapple Ham Bake 😋 – The Ultimate Sweet & Savory Comfort Dish If you’re searching for a high-RPM, comfort-food recipe that people love clicking, saving, and cooking again and again, this Brown Sugar Pineapple Ham Bake is it. Sweet, sticky brown sugar. Juicy pineapple. Tender, savory ham. Baked together into one irresistible dish…
-

Angel Chicken Pasta – The Creamy Comfort Food That Everyone Loves
Few dishes feel as comforting, indulgent, and crowd-pleasing as Angel Chicken Pasta. This creamy, slow-cooked chicken pasta recipe has earned its name because it’s truly heavenly—rich, velvety sauce, tender chicken, and perfectly cooked pasta all coming together in one unforgettable meal. Angel Chicken Pasta is one of those recipes that never goes out of style.…