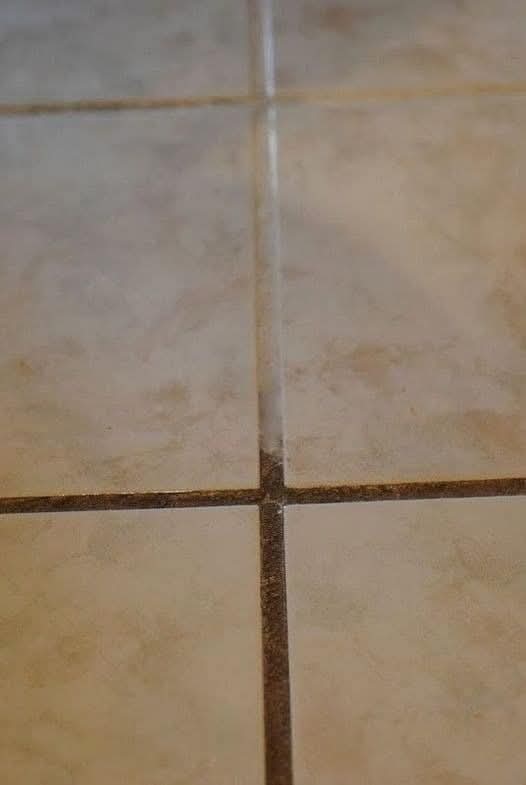
Is there anything more frustrating than sparkling clean tiles separated by dingy, gray, or mildew-speckled grout lines? No matter how much you scrub, that grout can seem to hold onto dirt and discoloration with a vengeance, dragging down the entire look of your bathroom or kitchen. Before you resort to harsh chemicals, expensive professional services, or even regrouting, there’s a powerful, natural, and incredibly effective solution hiding in your pantry.
Forget the fancy products with endless promises. The ultimate grout-cleaning weapon is a simple paste made from two household staples: baking soda and hydrogen peroxide. This dynamic duo works together to lift, bleach, and sanitize grout without the toxic fumes or excessive elbow grease. This guide will walk you through the foolproof, easy DIY grout cleaning solution that will restore your tiles to their original glory.
Why This Baking Soda & Hydrogen Peroxide Method Works
This isn’t just a folk remedy; it’s chemistry in action:
· Baking Soda (Sodium Bicarbonate): A gentle but effective abrasive that scrubs away surface grime without scratching like harsher scouring powders can. It also helps to deodorize.
· Hydrogen Peroxide (3% Solution): A natural bleaching and disinfecting agent. It oxidizes stains (breaking them down at a molecular level) and kills mold and mildew spores on contact.
· Together: They create a mild, effervescing paste that gets into the porous grout, lifts deep-seated dirt, and brightens discoloration. It’s a natural grout cleaner that’s safe for most tile types and far cheaper than commercial options.
What You’ll Need:
· The Cleaners:
· Baking soda
· Hydrogen peroxide (3% standard solution)
· Dish soap (for pre-cleaning greasy areas)
· White vinegar (for a final rinse/disinfect—used separately)
· The Tools:
· A small bowl
· A spoon or spatula
· A stiff-bristled brush (a grout brush or even a dedicated toothbrush)
· A toothpick or pointed grout tool (for packed-in grime)
· Microfiber cloths or old towels
· Spray bottle
· Knee pads (your knees will thank you!)
· Safety Gear: Rubber gloves and, if you’re sensitive, eye protection.
The Step-by-Step Process for Sparkling Grout
Step 1: Preparation is Key
Clear the Area: Remove bath mats, toiletries, etc.
Pre-Clean: Sweep or vacuum loose debris from the tile. For kitchen backsplashes or floors with grease, spray with a mix of warm water and a few drops of dish soap, wipe, and rinse. This removes the top layer of grime so the paste can work on the deep stains.
Protect Yourself: Put on your gloves.
Step 2: Mix the Magic Paste
In your small bowl, combine baking soda and hydrogen peroxide.
Start with a 2:1 ratio—two parts baking soda to one part peroxide. Add the peroxide slowly until you form a thick, spreadable paste, similar to the consistency of toothpaste.
Pro Tip: You can mix directly in an old Parmesan cheese shaker for easy application along grout lines!
Step 3: Apply and Let It Work
Using your finger (gloved!), the spoon, or your shaker, apply the paste directly onto the grout lines. Coat them generously.
Let it sit for 5-10 minutes. You’ll see and hear it lightly fizzing as it works. For tough stains, you can let it sit for up to 15-20 minutes, but don’t let it dry completely.
Step 4: The Elbow Grease (Minimal Edition)
Take your stiff-bristled brush and scrub the grout lines in a circular motion. The baking soda provides gentle abrasion. For corners or tight spots, use the toothbrush or a toothpick.
Focus on one small section at a time (e.g., a 3×3 tile area).
Step 5: Rinse and Reveal
Use a damp microfiber cloth to wipe away the paste and loosened grime from the tile and grout.
Final Rinse: Fill your spray bottle with clean water or a 50/50 mix of water and white vinegar. The vinegar will help neutralize any residue, add shine, and provide extra disinfecting power. Spray the area and wipe dry with a clean microfiber cloth. Important: Never mix vinegar with hydrogen peroxide in a bottle—use them separately in the rinse stage.
Step 6: Admire and Maintain
Once dry, your grout should look significantly brighter and cleaner.
For Maintenance: Keep a mix of 1 part hydrogen peroxide to 2 parts water in a spray bottle. After showering or mopping, spray grout lines and let it air dry to prevent mildew growth.
Pro Tips & Troubleshooting for Stubborn Stains
· For Mold/Mildew: Add 1-2 drops of tea tree oil or bleach (caution: do not mix with vinegar ever) to the paste for extra killing power. Ensure good ventilation.
· For Grease (Kitchens): A pre-scrub with a degreasing dish soap is essential before the paste.
· For Really Packed-In Dirt: Use a steam cleaner. The intense heat and pressure will blast grime out of porous grout with minimal chemical use. It’s the ultimate upgrade for this process.
· For Colored Grout: Always test in an inconspicuous area first (like in a closet or behind the toilet) to ensure the peroxide doesn’t lighten the color.
· If Stains Persist: For iron/rust stains, a paste of baking soda and lemon juice can work. For severe cases, a commercial oxygen bleach cleaner (like OxiClean) is a stronger, still relatively gentle option.
What NOT To Do
· Don’t use vinegar with bleach. This creates toxic chlorine gas.
· Don’t use overly abrasive tools like steel wool or metal brushes on glazed tile, as they will scratch.
· Don’t skip the sealant after cleaning. Once your grout is completely dry (wait 48 hours), apply a quality grout sealer. This is the single best thing you can do to keep it clean longer, as it prevents stains from penetrating in the first place.
The Final Shine: A Little Effort for a Big Reward
Cleaning grout is never going to be a “fun” chore, but with this effective, affordable, and natural method, it becomes a manageable DIY task with dramatic, satisfying results. The transformation from dingy to bright can make an entire room look and feel cleaner, newer, and more cared for.
So, arm yourself with baking soda and peroxide, put on some good music, and get ready to reveal the clean, bright lines hiding beneath the grime. Your tiles—and your inner clean freak—will thank you.
Found this guide helpful? Share it with a friend who’s been battling dirty grout! Have your own grout-cleaning hack? Let us know in the comments below.
More Recipes You Might Like
-

Cheesy Potato Patties 😋 – Crispy, Golden, and Irresistibly Cheesy If you’re looking for a high-RPM comfort food recipe that gets clicks, saves, and repeat cooks, Cheesy Potato Patties are a guaranteed winner. Crispy on the outside, soft and fluffy on the inside, and loaded with melty cheese—this recipe checks every box readers love: easy…
-

Brown Sugar Pineapple Ham Bake 😋 – The Ultimate Sweet & Savory Comfort Dish If you’re searching for a high-RPM, comfort-food recipe that people love clicking, saving, and cooking again and again, this Brown Sugar Pineapple Ham Bake is it. Sweet, sticky brown sugar. Juicy pineapple. Tender, savory ham. Baked together into one irresistible dish…
-

Angel Chicken Pasta – The Creamy Comfort Food That Everyone Loves
Few dishes feel as comforting, indulgent, and crowd-pleasing as Angel Chicken Pasta. This creamy, slow-cooked chicken pasta recipe has earned its name because it’s truly heavenly—rich, velvety sauce, tender chicken, and perfectly cooked pasta all coming together in one unforgettable meal. Angel Chicken Pasta is one of those recipes that never goes out of style.…