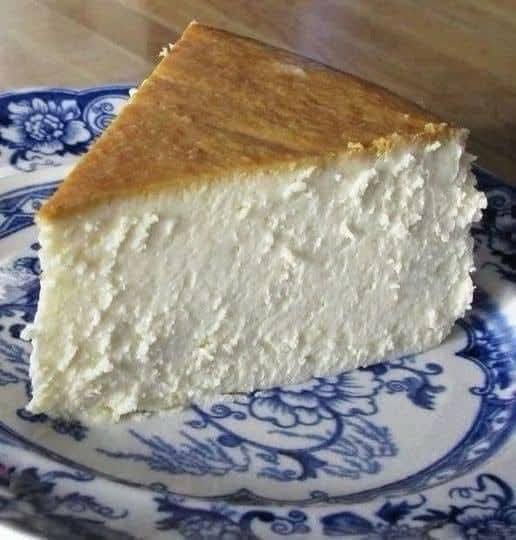
If there is one dessert that reigns supreme in the pantheon of classic American sweets, it is the New York Cheesecake. With its impossibly tall, stark white interior, its faintly tangy and profoundly rich flavor, and its signature dense-yet-creamy texture that sits proudly on a buttery graham cracker crust, it is the gold standard. Yet, for many home bakers, achieving that perfect, crack-free, restaurant-quality slice at home feels like a distant dream—fraught with the perils of over-mixing, water bath leaks, and the heartbreak of the dreaded top-down crack.
Enter Chantal’s New York Cheesecake. This isn’t just another recipe; it’s a legend passed through online forums, baking communities, and family kitchens for over two decades. Originally published by home baker Chantal on AllRecipes, this recipe has amassed thousands of five-star reviews and a cult-like following for one simple reason: it works. It is the ultimate no-fail cheesecake recipe that promises—and delivers—a flawless, creamy, and majestic dessert every single time. This is the comprehensive guide to mastering Chantal’s masterpiece, complete with the science-backed tips to ensure your classic New York cheesecake is nothing short of perfection.
The Story Behind the Legend: Why This Cheesecake?
The magic of Chantal’s recipe lies in its elegant simplicity and a few key, intelligent techniques. Unlike some recipes that incorporate flour or cornstarch, this one relies on the perfect balance of ingredients and method to achieve its structure. It uses a full two pounds of cream cheese, a moderate amount of sugar to keep the tang, a full cup of sour cream for velvety richness, and just enough eggs to bind it without making it eggy. The method emphasizes room temperature ingredients and minimal, gentle mixing to incorporate as little air as possible—the secret enemy of a smooth surface. It’s a recipe designed for the home cook, with clear instructions that demystify the process.
Understanding the Anatomy of Perfection: Key Recipe Principles
Before you preheat your oven, let’s understand the why behind the steps. This knowledge is your insurance policy against cracks and sinks.
Room Temperature is Non-Negotiable: Cold cream cheese will never blend smoothly. Lumps force you to over-mix, which whips in air and leads to cracks. Room-temperature eggs incorporate evenly without curdling the batter.
Low and Slow is the Way to Go: A gentle bake in a moderate oven (325°F) followed by a long, slow cool-down in the turned-off oven prevents the drastic temperature change that causes the center to sink and the top to split.
The Water Bath is Your Best Friend: Baking the cheesecake in a water bath (or bain-marie) creates a humid oven environment. This gentle, even heat prevents the edges from setting too quickly and overcooking before the center is done, which is the primary cause of cracking.
Patience is the Secret Ingredient: Rushing the cooling process is the final hurdle. Letting the cheesecake cool gradually, then chilling it thoroughly (overnight is ideal) allows the structure to set completely, resulting in that perfect, clean slice.
Chantal’s New York Cheesecake: The Complete Recipe
Prep Time: 30 min | Cook Time: 1 hr 10 min + 1 hr in-off oven | Chill Time: 4 hours minimum (overnight best) | Total Time: ~7 hours (mostly inactive) | Yield: One 9-inch cheesecake, 12-16 servings
Ingredients:
For the Graham Cracker Crust:
· 1 ½ cups graham cracker crumbs (about 12 full sheets)
· ¼ cup granulated sugar
· 6 tablespoons unsalted butter, melted
· Pinch of salt
For the Legendary Filling:
· 4 (8 oz) packages full-fat cream cheese, completely softened to room temperature
· 1 ½ cups granulated sugar
· ¾ cup whole milk
· 4 large eggs, at room temperature
· 1 cup full-fat sour cream, at room temperature
· 1 tablespoon pure vanilla extract
· ¼ cup all-purpose flour (Note: Some purists omit this; it adds a slight bit of insurance against cracking)
Essential Equipment:
· 9-inch springform pan
· Heavy-duty aluminum foil
· Roasting pan large enough to hold the springform pan
· Stand mixer or electric hand mixer
· Large roasting pan or baking dish for water bath
Step-by-Step Instructions:
Part 1: The Fortified Crust & Pan Prep
Preheat & Prep: Position a rack in the lower third of your oven. Preheat to 325°F (165°C). Bring a kettle of water to a boil for the water bath later.
Waterproof the Pan: This is critical. Tear off two large sheets of heavy-duty aluminum foil. Place the springform pan in the center of the first sheet and wrap the foil upwards around the sides, ensuring no tears. Repeat with the second sheet. This double layer prevents any water from seeping into your crust.
Make the Crust: In a medium bowl, combine graham cracker crumbs, sugar, and a pinch of salt. Pour in the melted butter and mix with a fork until the mixture resembles wet sand and holds together when pinched.
Press and Pre-bake: Pour the crumb mixture into the bottom of the prepared springform pan. Using the bottom of a flat glass or measuring cup, press the crumbs firmly and evenly into the bottom and about 1 inch up the sides. Bake the crust for 10 minutes. Remove and let it cool on a rack while you make the filling. Leave the oven on.
Part 2: The Silky-Smooth Filling
Beat the Cream Cheese & Sugar: In the bowl of a stand mixer fitted with the paddle attachment (or using a hand mixer), beat the softened cream cheese on medium-low speed until it is completely smooth, creamy, and lump-free, about 2-3 minutes. Scrape down the bowl and beater thoroughly.
Incorporate the Milk & Flour: With the mixer on low, gradually pour in the milk and beat just until combined. Scrape down the bowl. Add the flour (if using) and mix on low until just incorporated.
Add Eggs, One at a Time: This is a crucial step. Add the eggs one at a time, mixing on low speed only until each yolk disappears into the batter before adding the next. Do not overmix after adding the eggs. Over-beating incorporates air and protein, which leads to rising and falling (and cracking).
Finish with Sour Cream & Vanilla: Add the sour cream and vanilla extract. Mix on low speed just until the batter is homogeneous, smooth, and luxurious. Scrape the bowl one final time and give a gentle stir by hand to ensure no hidden lumps.
Assemble: Pour the filling over the cooled crust. Tap the pan gently on the counter 5-6 times to release any large air bubbles. Smooth the top with an offset spatula.
Part 3: The Gentle Water Bath Bake
Prepare the Bath: Place the foil-wrapped springform pan into your large roasting pan. Carefully pour the hot water from the kettle into the roasting pan until it comes about halfway up the sides of the springform pan.
Bake: Carefully transfer the whole setup to the preheated oven. Bake for 1 hour to 1 hour 10 minutes. The cheesecake is done when the edges are set and puffed, but the center (about a 4-inch circle) is still slightly wobbly and jiggly when you gently shake the pan. It will look underdone—this is correct. The center will set as it cools.
The Crucial Slow Cool: Turn off the oven. Crack the oven door open with a wooden spoon. Let the cheesecake sit in this cooling oven for 1 full hour. This gradual temperature drop is the final key to a crack-free top.
Counter Cool & Chill: Remove the cheesecake from the water bath, carefully peel off the foil, and place it on a wire rack to cool to room temperature, about 2 more hours. Then, loosely cover it with plastic wrap and refrigerate for at least 4 hours, but ideally overnight.
Serving & Storage:
· To Serve: Run a thin knife under hot water, dry it, and gently slide it around the inside edge of the pan before unclasping the springform ring. Transfer to a cake stand. Slice with a clean, hot knife for pristine pieces.
· Storage: Keep covered in the refrigerator for up to 5 days.
· Freezing: This cheesecake freezes beautifully. Wrap the whole cooled cheesecake (or individual slices) tightly in plastic wrap and then foil. Freeze for up to 2 months. Thaw overnight in the refrigerator.
Pro Tips & Troubleshooting: Your Cheesecake Guardian Angel
· The No-Flour Variation: For the purist, ultra-dense NY-style slice, you can omit the ¼ cup of flour. The baking and cooling instructions remain the same.
· Avoiding Cracks: If a small crack appears, don’t despair! It’s a sign of real, homemade cheesecake. Top it with a luxurious sour cream topping (mix 1.5 cups sour cream, ¼ cup sugar, 1 tsp vanilla, spread on warm cheesecake after the initial bake, and broil for 3-4 min) or a berry compote.
· Flavor Variations: Add the zest of one lemon to the batter for brightness. For a marble cheesecake, reserve 1 cup of batter, mix with 3 tbsp cocoa powder, and dollop/swirl before baking.
· Crust Alternatives: Substitute gingersnaps, chocolate wafer cookies, or Biscoff cookies for the graham crackers.
Frequently Asked Questions (FAQ)
Q: Can I use a different size pan?
A:A 9-inch is ideal. A 10-inch will yield a thinner cheesecake and require less baking time (start checking at 45 min). Do not use a smaller pan, as it will overflow.
Q: My cream cheese still has lumps!
A:Ensure it is truly room temperature (let sit out for 3-4 hours). If lumps persist, place the blocked in a bowl over a pot of simmering water for 30-second intervals to gently warm it further.
Q: Can I skip the water bath?
A:It is strongly not recommended. The water bath is essential for even, gentle heat and is the primary defense against cracks. If you must skip it, reduce the oven temperature to 300°F and expect possible cracking.
Q: Why did my cheesecake brown on top?
A:A very light golden hue is normal. If it’s browning too much, your oven may run hot or your rack may be too high. Use the lower third position and consider placing a baking sheet on the rack above to shield it.
Q: Is there a substitute for sour cream?
A:Full-fat Greek yogurt or crème fraîche can be used in a 1:1 ratio, though the tang and texture will vary slightly.
The Final Slice: A Timeless Classic, Perfected
Chantal’s New York Cheesecake is more than a recipe; it’s a rite of passage for the serious home baker. It teaches patience, precision, and the profound satisfaction of creating something truly spectacular from simple ingredients. This cheesecake commands respect at any gathering—be it a holiday dinner, a birthday celebration, or simply a Tuesday night treat.
With this guide, you are equipped not just with a list of steps, but with the understanding to execute them flawlessly. So, take a deep breath, trust the process, and prepare to unveil a dessert that will have everyone asking, “Is this really homemade?” The answer, with pride, will be a resounding yes.
Now, it’s your turn to create a legend in your own kitchen. Have you made Chantal’s famous recipe before? What are your secrets for the perfect slice? Share your stories, photos, and tips in the comments below—let’s build a community of flawless cheesecake bakers!
P.S. Know someone who needs this no-fail recipe in their life? Share this article with them! And for more classic dessert recipes and baking science tips, subscribe to get our latest guides delivered straight to your inbox. Happy baking
More Recipes You Might Like
-

Cheesy Potato Patties 😋 – Crispy, Golden, and Irresistibly Cheesy If you’re looking for a high-RPM comfort food recipe that gets clicks, saves, and repeat cooks, Cheesy Potato Patties are a guaranteed winner. Crispy on the outside, soft and fluffy on the inside, and loaded with melty cheese—this recipe checks every box readers love: easy…
-

Brown Sugar Pineapple Ham Bake 😋 – The Ultimate Sweet & Savory Comfort Dish If you’re searching for a high-RPM, comfort-food recipe that people love clicking, saving, and cooking again and again, this Brown Sugar Pineapple Ham Bake is it. Sweet, sticky brown sugar. Juicy pineapple. Tender, savory ham. Baked together into one irresistible dish…
-

Angel Chicken Pasta – The Creamy Comfort Food That Everyone Loves
Few dishes feel as comforting, indulgent, and crowd-pleasing as Angel Chicken Pasta. This creamy, slow-cooked chicken pasta recipe has earned its name because it’s truly heavenly—rich, velvety sauce, tender chicken, and perfectly cooked pasta all coming together in one unforgettable meal. Angel Chicken Pasta is one of those recipes that never goes out of style.…