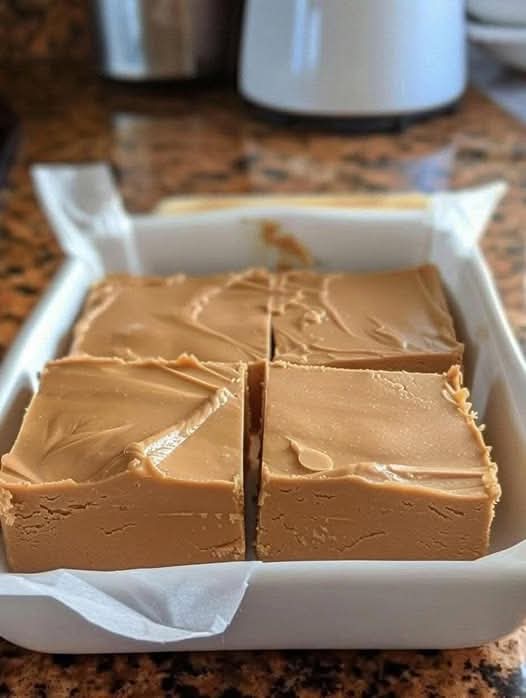
There’s a certain magic to a piece of homemade fudge. It’s a texture unlike any other—simultaneously creamy, rich, and melt-in-your-mouth smooth—that store-bought versions simply can’t replicate. And when that fudge is infused with the beloved, nutty sweetness of peanut butter? You have an all-time classic, crowd-pleasing treat that feels like a hug in dessert form.
Welcome to the simplest, most foolproof path to fudge perfection. This 4-ingredient peanut butter fudge requires no candy thermometer, no complicated stages, and no baking. It’s a quick no-bake dessert that comes together in about 10 minutes of active time, yet yields a decadent result that will have everyone convinced you spent hours in the kitchen.
Whether you need a last-minute holiday gift, a surefire potluck contribution, or just a dose of sweet nostalgia, this recipe is your secret weapon. We’ll walk through the effortless method, explore fun variations, and share the pro tips for getting that perfect, sliceable texture every single time. Get ready to make the creamiest, most addictive peanut butter fudge of your life.
The Soul of the Sweet: Why This Fudge Recipe is a Masterpiece of Simplicity
Before we gather our ingredients, let’s appreciate the elegant simplicity of this recipe. It bypasses the traditional, finicky sugar-cooking methods for a modern, failsafe technique.
The “Foolproof” Foundation: Traditional fudge requires cooking sugar syrup to the precise “soft-ball stage” (238°F). This recipe uses sweetened condensed milk as the sweet, creamy, and stable base. It guarantees a smooth texture without any risk of graininess or crystallized sugar.
The Power of Two Ingredients: The magic happens when sweetened condensed milk meets melted chocolate chips. The chips provide structure and a fudgy body as they reset, while the milk provides the luscious, creamy mouthfeel. It’s a perfect culinary partnership.
The Peanut Butter Promise: Using high-quality, standard creamy peanut butter (not the natural, oily kind) ensures the fudge sets properly and delivers that iconic, robust peanut flavor in every single bite.
The Speed & Ease Equation: From microwave to fridge in under 15 minutes? That’s the kind of dessert alchemy we can all get behind. It’s the ultimate emergency dessert recipe for unexpected guests or sudden cravings.
Gathering Your Ingredients: A Short & Sweet Checklist
The beauty is in the shortlist. Using the right four ingredients is crucial for success.
The Core Four:
· 3 cups (18 oz) high-quality semi-sweet chocolate chips: Or a mix of semi-sweet and milk chocolate. The chips are formulated to melt and set perfectly.
· 1 can (14 oz) sweetened condensed milk (NOT evaporated milk): This is the non-negotiable key to creaminess and sweetness.
· 1 cup creamy peanut butter: Use a standard, homogenized brand like Jif or Skippy. Avoid natural peanut butter (the kind that separates), as the extra oil can prevent the fudge from setting properly.
· 1 teaspoon pure vanilla extract: For depth of flavor.
· Pinch of salt: To enhance all the flavors.
Optional Add-Ins & Toppings:
· ½ cup chopped peanuts for crunch.
· A sprinkle of flaky sea salt on top for a gourmet sweet-salty finish.
· ½ cup mini marshmallows or crushed pretzels folded in.
This easy no-bake dessert is the perfect last-minute holiday treat and a homemade gift idea everyone loves. As a quick 4-ingredient recipe, it’s a foolproof party dessert for potlucks and cookie swaps. Kids adore this simple peanut butter fudge, making it a fun family cooking project.”
Dietary Modification Spotlight:
· Gluten-Free: This recipe is naturally gluten-free. Ensure all add-ins (like pretzels) are certified GF.
· Dairy-Free: Use dairy-free chocolate chips and a canned coconut milk-based “sweetened condensed coconut milk.”
· Lower-Sugar: Use sugar-free chocolate chips and a lower-sugar peanut butter. Note that sweetened condensed milk is inherently high in sugar.
Essential Kitchen Tools You’ll Need
· 8×8 inch Baking Pan for thick fudge squares.
· Parchment Paper for foolproof removal and clean slicing.
· Large, Microwave-Safe Mixing Bowl (or a medium saucepan for stovetop).
· Spatula
· Measuring Cups
Step-by-Step Instructions: Foolproof, No-Thermometer Fudge
Prep Time: 10 mins | Setting Time: 2+ hours | Total Time: 2 hours 10 mins | Yields: 64 one-inch pieces
Step 1: Prep Your Pan
Line your 8×8 inch pan with parchment paper,leaving an overhang on two opposite sides. This creates a “sling” that lets you lift the entire block of fudge out for easy slicing. Lightly grease the parchment or spray with non-stick spray.
Step 2: Melt the Foundation
In your large microwave-safe bowl,combine the chocolate chips, sweetened condensed milk, and pinch of salt. Microwave in 30-second bursts, stirring vigorously after each interval, until the mixture is completely smooth and melted. This usually takes about 90 seconds total. Do not overheat. Alternatively, melt together in a saucepan over low heat, stirring constantly.
Step 3: Incorporate the Star
Stir thevanilla extract into the melted chocolate mixture. Then, immediately add the 1 cup of creamy peanut butter. Stir until the peanut butter is fully incorporated and the mixture is uniform. It will be very thick and glossy.
Step 4: Press and Set
Pour and scrape the thick fudge mixture into your prepared pan.Use your spatula to press it into an even, smooth layer. If using, sprinkle the top with chopped peanuts or a light dusting of sea salt, gently pressing them in.
Step 5: The Crucial Chill
Refrigerate the fudge,uncovered, for at least 2-3 hours, or until completely firm. For the cleanest cuts, you can let it set overnight.
Step 6: Slice into Perfection
Use the parchment paper sling to lift the fudge block onto a cutting board.Using a large, sharp knife (wiping it clean with a hot, damp cloth between cuts for neat squares), slice into 1-inch pieces.
Pro Chef Tips & Common Mistakes to Avoid
· The Right Peanut Butter is Everything: This cannot be overstated. Use a standard, shelf-stable creamy peanut butter. Natural, oily peanut butter will make your fudge greasy and prevent it from setting.
· Don’t Rush the Melting: Low and slow is the key. Overheating chocolate can cause it to “seize” (become grainy and clumpy). If this happens, you can sometimes rescue it by stirring in an extra tablespoon of peanut butter or condensed milk.
· Press it Firmly: Really press the fudge into the corners of the pan. This eliminates air bubbles and ensures even slices.
· Let it Set Completely: Slicing too soon will result in a messy, soft product. Patience is a virtue with fudge.
· Common Mistake: Substituting Evaporated Milk. Sweetened condensed milk is thick and sugary. Evaporated milk is thin and unsweetened. They are not interchangeable here.
· For Super-Creamy Fudge: Add 2 tablespoons of softened butter to the mixture with the peanut butter.
Creative Twists & Flavor Variations
Swirled Peanut Butter Fudge: Reserve ½ cup of the fudge mixture before adding peanut butter. Spread the peanut butter fudge in the pan, then dollop the plain chocolate fudge on top and swirl with a knife.
Chocolate-Peanut Butter Layered Fudge: Make a plain chocolate fudge layer (just chips and condensed milk), let it set for 30 minutes, then spread the peanut butter fudge mixture on top.
Buckeye Fudge: Press whole or halved peanut butter cups into the top of the warm fudge before chilling.
Rocky Road: Fold 1 cup of mini marshmallows and ½ cup of chopped nuts into the mixture before pressing into the pan.
Spicy Kick: Add ¼ teaspoon of cayenne pepper to the melted chocolate for a subtle, grown-up heat.
Serving Suggestions & Pairing Ideas
· The Classic: Serve squares on a festive plate at room temperature for the best texture and flavor.
· As a Gift: Package in a decorative tin or box with layers of parchment between squares. It makes a heartfelt, homemade holiday gift.
· Dessert Platter: Include fudge squares on a cookie or dessert charcuterie board.
· With Coffee: The rich fudge pairs wonderfully with a strong cup of black coffee or espresso.
· Ice Cream Topping: Crumble a square over vanilla ice cream for an incredible sundae.
Storing, Freezing, and Reheating Instructions
· Storing: Keep fudge in an airtight container in the refrigerator for up to 2 weeks. It can be kept at cool room temperature for a few days if your kitchen isn’t warm.
· Freezing: Fudge freezes beautifully. Layer squares between parchment in an airtight container. Freeze for up to 3 months. Thaw in the refrigerator.
· Reheating: Not applicable. Enjoy cold or at room temperature.
Frequently Asked Questions (FAQ)
Q: Why is my fudge too soft/not setting?
A:The most common culprit is using natural peanut butter. Another reason could be not chilling it long enough, or a very warm kitchen. Pop it back in the fridge. If it truly won’t set, you can repurpose it as a delicious ice cream topping!
Q: Can I use crunchy peanut butter?
A:Yes, absolutely! It will give you lovely peanut bits throughout.
Q: My fudge is grainy. What happened?
A:The chocolate was likely overheated or had moisture introduced, causing it to seize. Next time, melt more gently.
Q: Can I double this recipe?
A:Yes. Use a 9×13 inch pan and double all ingredients. The setting time may be slightly longer.
Q: Can I make this on the stovetop?
A:Yes. Combine chips, condensed milk, and salt in a heavy-bottomed saucepan over the lowest possible heat. Stir constantly until melted, then remove from heat and proceed.
Conclusion: The Timeless Treat That Never Fails to Delight
Creamy Peanut Butter Fudge is a testament to the joy of simple, honest ingredients coming together to create something extraordinary. It’s a recipe that builds confidence in new bakers and offers seasoned cooks a reliably spectacular result with minimal effort.
It’s more than candy; it’s a token of generosity, a spark of nostalgia, and a universally loved sweet that bridges generations. In a world of complicated recipes, this 4-ingredient wonder stands out for its pure, delicious simplicity.
Now, I’d love to hear from you: Do you have a family fudge recipe or a favorite add-in? Will you try the swirled or layered version? Share your fudge memories and creations in the comments below! And if this recipe becomes your go-to for gifting and celebrating, please share it with a friend and pin it for the next time a sweet craving strikes.
More Recipes You Might Like
-

Cheesy Potato Patties 😋 – Crispy, Golden, and Irresistibly Cheesy If you’re looking for a high-RPM comfort food recipe that gets clicks, saves, and repeat cooks, Cheesy Potato Patties are a guaranteed winner. Crispy on the outside, soft and fluffy on the inside, and loaded with melty cheese—this recipe checks every box readers love: easy…
-

Brown Sugar Pineapple Ham Bake 😋 – The Ultimate Sweet & Savory Comfort Dish If you’re searching for a high-RPM, comfort-food recipe that people love clicking, saving, and cooking again and again, this Brown Sugar Pineapple Ham Bake is it. Sweet, sticky brown sugar. Juicy pineapple. Tender, savory ham. Baked together into one irresistible dish…
-

Angel Chicken Pasta – The Creamy Comfort Food That Everyone Loves
Few dishes feel as comforting, indulgent, and crowd-pleasing as Angel Chicken Pasta. This creamy, slow-cooked chicken pasta recipe has earned its name because it’s truly heavenly—rich, velvety sauce, tender chicken, and perfectly cooked pasta all coming together in one unforgettable meal. Angel Chicken Pasta is one of those recipes that never goes out of style.…