The Ultimate Guide to Removing Years of Grease and Grime from Your Oven: A Step-by-Step Deep Clean That Actually Works
Is your oven a scene from a culinary horror story? Do you dread turning on the light, only to reveal a landscape of baked-on spills, carbonized splatters, and a thick, sticky layer of brownish-black grime that’s seen more birthdays than your kitchen towels? You’re not alone. An oven neglected over years becomes a fortress of filth, where grease polymerizes into a plastic-like coating and food particles carbonize into cement. But fear not—restoring it to a sparkling, like-new state is not only possible, it’s deeply satisfying. This is your complete, battle-tested guide to conquering years of oven grease and grime with methods ranging from heavy-duty chemical solutions to natural DIY cleaners. We’ll cover the tools, the techniques, and the tricks to tackle this daunting chore efficiently and effectively.
Why a Clean Oven Matters (Beyond Just Looks)
Before we dive into the scrubbing, let’s talk motivation. A clean oven isn’t just about aesthetics or avoiding judgment from your mother-in-law.
· Safety: Accumulated grease is a fire hazard. Those layers can ignite, causing a dangerous oven fire.
· Efficiency: A thick layer of grime acts as an insulator, forcing your oven to work harder and less evenly, leading to poor cooking results and higher energy bills.
· Taste and Smell: That burnt, acrid smell every time you preheat? It’s tainting your food. A clean oven means cleaner-tasting meals.
· Longevity: Corrosive acids from burnt food and grease can damage the oven’s interior enamel over time.
Tackling years of buildup is a project, but view it as a home maintenance deep clean with a massive payoff. Set aside 3-6 hours depending on severity. Your future self, baking a pristine loaf of bread, will thank you.
Phase 1: The Preparation – Gearing Up for Battle
Safety First:
· Ventilation is KING. Open all windows, turn on the kitchen fan, and consider using a box fan in the window. Fumes from cleaners can be strong.
· Protect Yourself: Wear long rubber gloves (elbow-length if you have them), safety glasses to protect from splashes, and old clothes.
· Protect Your Kitchen: Remove all racks and trays first. Lay down old towels or newspaper around the oven to protect your floor. The drips will be nasty.
Gather Your Arsenal:
Choose your primary weapon based on your preference for chemical vs.natural methods.
For the Chemical (Heavy-Duty) Approach:
· Commercial Oven Cleaner (The Nuclear Option): Look for a cream-based, fume-reduced formula containing sodium hydroxide (lye). Brands like Easy-Off Heavy Duty (in the yellow can) are industry standards for a reason. Handle with extreme care.
· Plastic Scraper or Putty Knife: For lifting off thick, baked-on sheets of grime.
· Heavy-Duty Scouring Pads (Dobie Pads, or non-scratch Scotch-Brite) and Stiff Nylon Brush.
· Microfiber Cloths & Sponges.
· Large Garbage Bags (for soaking racks).
For the Natural (DIY) Approach:
· Baking Soda (a whole box, or more).
· Distilled White Vinegar (a large bottle).
· Dish Soap (the classic blue Dawn Platinum is a grease-cutting champion).
· Hydrogen Peroxide (optional, for extra boost).
· Spray Bottle.
· Plastic Scraper.
· Same scrubbing tools as above.
Phase 2: The Attack – Step-by-Step Deep Clean Method
Step 1: Remove and Pre-Soak the Racks & Accessories
This is a game-changer.Your oven racks are likely caked in grime. Place them in your bathtub or a large plastic storage bin. For a chemical soak, use a cup of dishwasher detergent and the hottest water you can get. For a natural soak, use 1 cup each of baking soda and vinegar, then top with hot water. Let them soak for at least 2 hours, preferably overnight. This will loosen 90% of the gunk, making scrubbing easy.
Step 2: The Interior Clean – Two Powerful Methods
METHOD A: The Commercial Cleaner Strategy (For Severe, Years-Old Buildup)
Read the Label Meticulously: Instructions and warnings vary. Most require a cool oven.
Apply Generously: Wearing your gloves and glasses, spray or spread the cream cleaner over the entire interior—AVOID heating elements, any holes for broilers, and the oven light bulb. Pay special attention to the roof and back wall, which often have the worst buildup. DO NOT USE ON SELF-CLEANING OVEN DOOR GASKETS (the rubber seal). It can degrade them.
Let it Dwell: Close the door and let the cleaner work for the recommended time, usually 1-2 hours. For apocalyptic grime, you can leave it on longer (even overnight), but check label instructions.
The Reveal and Scrape: After dwelling, the grime should have softened into a gooey, bubbly mess. Use your plastic scraper to gently lift and remove large sheets of sludge. Scrape into a newspaper or old container for disposal.
Scrub: With your gloves still on, use your scouring pad and brush with hot, soapy water (Dawn is perfect here) to scrub the remaining residue. The cleaner has done the chemical breakdown; you’re now doing mechanical removal.
Rinse Thoroughly: This is critical. Use a sponge and clean water to wipe down every surface multiple times until all cleaner residue is gone. Any leftover sodium hydroxide can emit fumes when you next heat the oven.
METHOD B: The Baking Soda Paste Power Clean (Natural & Effective)
Create a Super Paste: In a bowl, mix baking soda with a small amount of water until it forms a thick, spreadable paste. The consistency should be like Elmer’s glue.
Apply Liberally: Using your hands (with gloves!) or a spatula, smother every inch of the oven’s dirty interior with the paste. Avoid heating elements. Apply a thicker layer on the worst spots. It should completely cover the grime; you’re creating a poultice.
Let it Work Its Magic: Let the paste sit for at least 12 hours, or preferably 24. The baking soda will act as a gentle abrasive and, through alkalinity, help break down the grease.
The Vinegar Activation: After dwelling, fill a spray bottle with white vinegar. Lightly mist the dried baking soda paste. It will fizz (the acid-base reaction), which helps further loosen grime.
Scrape and Scrub: Use your plastic scraper to remove the paste, which will have turned into a brown, sludgy mess. Follow with your scouring pad and a mix of hot water, dish soap, and a little more vinegar for a powerful, natural degreasing solution.
Final Rinse: Wipe clean with water until all pasty residue is gone.
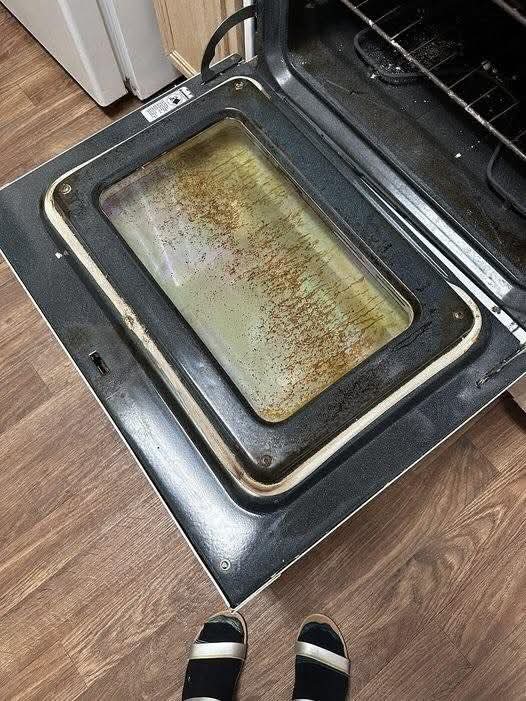
Step 3: Conquering the Oven Door – The Often-Forgotten Battlefield
The door,especially the inner glass panel, is a grease magnet. Never spray commercial cleaner between the glass layers.
Check if it’s removable: Many oven doors can be carefully unhooked and laid flat. Consult your manual.
For the interior side (facing the oven): Clean using your chosen method above.
For between the glass (if filthy): If the door doesn’t come apart, create a “cleaner sandwich.” Soak a thin rag or paper towel in your cleaning solution (diluted Dawn/vinegar works well). Slide it between the glass layers using a thin plastic card (like an old gift card). Move it around to wipe, using a dry rag to follow and dry.
Step 4: The Final Rinse, Dry, and Reassembly
Go over the entire interior one last time with a sponge and clean water. Your goal is zero cleaner residue.
Dry thoroughly with microfiber cloths to prevent rust or streaks.
Scrub your now-soaked racks with a scouring pad—the grime should slide off. Rinse and dry.
Carefully replace all racks and accessories.
Run a “Bake-Off”: Heat your empty, clean oven to 250°F (120°C) for 15-20 minutes to evaporate any last moisture. Then, open the windows and let it cool. This ensures no odd smells on your first real use.
Phase 3: Pro Tips, Tricks, and Troubleshooting
· For Stubborn, Carbonized Spots: Make a paste of baking soda and hydrogen peroxide (a 3% solution). Apply directly to the spot, let it sit for an hour, then scrub. The extra oxidizing power helps break down carbon.
· The Power of Steam: Before applying any cleaner, place a heatproof bowl of boiling water in the oven, close the door, and let it steam for 20 minutes. This hydrates and softens grime dramatically.
· Don’t Forget the Exterior and Drip Pans: Use a degreaser (like diluted Simple Green) or a paste of Barkeeper’s Friend for stubborn stainless steel or enamel stains on the outside.
· What About the Self-Cleaning Cycle? For years of heavy grease, use with extreme caution. The extreme heat (800-900°F) can bake on severe grime even harder, create overwhelming smoke, set off alarms, and potentially damage older oven components or electronics. It’s better for maintenance after the initial deep clean.
· Maintenance is Key: Once clean, wipe up spills after the oven has cooled (but is still warm). Place a disposable liner on the bottom (replacing it when dirty) to catch future drips.
Conclusion: The Sweet Smell of Success (Literally)
Conquering a filthy oven is one of the most transformative chores you can do in your home. It’s a physical reset for a crucial appliance. While the process requires time, elbow grease, and patience, the result—a safe, efficient, odor-free oven that bakes evenly—is worth every minute. You’ve not just cleaned; you’ve reclaimed a vital tool in your kitchen.
So, arm yourself with gloves, choose your method, and put on a podcast or an energizing playlist. Approach it not as a dreaded chore, but as a profound act of home care. The first time you preheat your sparkling-clean oven and smell…nothing at all, you’ll feel a wave of pure domestic triumph. Happy cleaning
More Recipes You Might Like
-

Cheesy Potato Patties 😋 – Crispy, Golden, and Irresistibly Cheesy If you’re looking for a high-RPM comfort food recipe that gets clicks, saves, and repeat cooks, Cheesy Potato Patties are a guaranteed winner. Crispy on the outside, soft and fluffy on the inside, and loaded with melty cheese—this recipe checks every box readers love: easy…
-

Brown Sugar Pineapple Ham Bake 😋 – The Ultimate Sweet & Savory Comfort Dish If you’re searching for a high-RPM, comfort-food recipe that people love clicking, saving, and cooking again and again, this Brown Sugar Pineapple Ham Bake is it. Sweet, sticky brown sugar. Juicy pineapple. Tender, savory ham. Baked together into one irresistible dish…
-

Angel Chicken Pasta – The Creamy Comfort Food That Everyone Loves
Few dishes feel as comforting, indulgent, and crowd-pleasing as Angel Chicken Pasta. This creamy, slow-cooked chicken pasta recipe has earned its name because it’s truly heavenly—rich, velvety sauce, tender chicken, and perfectly cooked pasta all coming together in one unforgettable meal. Angel Chicken Pasta is one of those recipes that never goes out of style.…