This vintage Frozen Fruit Salad Dessert is the ultimate easy summer treat! A creamy, fruity, no-bake frozen slice perfect for potlucks, BBQs, and beating the heat.
Close your eyes and take a bite of pure, frosty nostalgia. It’s sweet, but not too sweet. Creamy, yet studded with bursts of vibrant fruit and a satisfying crunch. It’s refreshing enough for the hottest summer day but feels indulgent enough for a celebration. This is the magic of the vintage Frozen Fruit Salad Dessert—a timeless no-bake treat that has been cooling down generations for good reason.
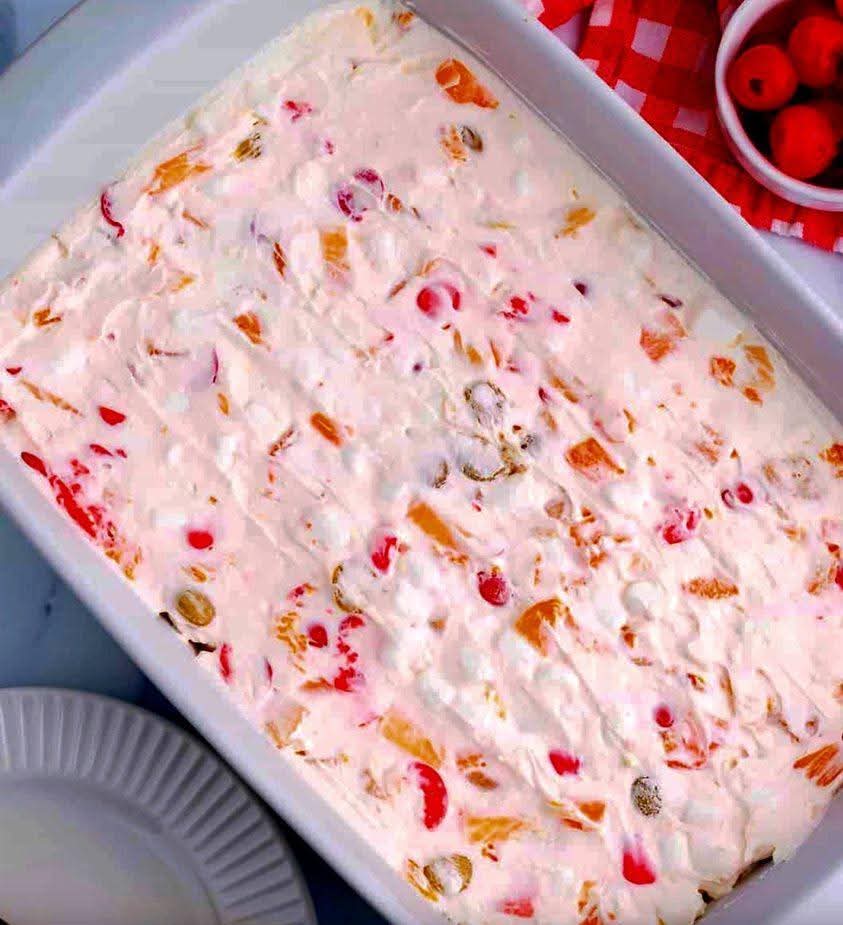
In an era of elaborate desserts, this recipe stands as a monument to brilliant simplicity. Imagine a velvety, slightly tangy cream cheese base, folded with colorful fruit cocktail, juicy cherries, and sometimes even mini marshmallows or nuts, all frozen into a sliceable, scoopable perfection. It’s the ultimate make-ahead dessert, sitting patiently in your freezer, ready to save the day at a moment’s notice. No oven required, no fancy skills needed—just mix, freeze, and serve.
Whether you’re looking for the perfect crowd-pleasing potluck contribution for the 4th of July, a refreshing end to a BBQ, a light dessert after a heavy meal, or just a fun, family-friendly treat to have on hand, this retro recipe is your answer. It’s easy, economical, and endlessly adaptable, a delicious reminder that the best recipes are often the simplest. Let’s bring back this cool classic.
Why This Vintage Dessert Deserves a Comeback
This isn’t just a block of frozen fluff; it’s a strategically perfect dessert for modern life, echoing the practicality of mid-century hostesses.
· The Ultimate Make-Ahead Marvel: You can make this days, even weeks, in advance. It’s the perfect freezer dessert for stress-free entertaining. Simply pull it out 10 minutes before you want to serve.
· No-Bake, No-Sweat Simplicity: When it’s too hot to turn on the oven, this dessert is your savior. It comes together with just a bowl and a spoon, making it a fantastic kid-friendly cooking project.
· Crowd-Scaling is Effortless: Need to feed a backyard full of people? Double or triple the recipe in a 9×13 pan. It’s a budget-friendly party dessert that stretches to feed everyone.
· The Perfect Texture Symphony: The contrast of the creamy, almost ice-cream-like base, the soft fruit, and the optional crunch from nuts or coconut is a delight. It’s light enough to enjoy after a big meal but satisfying enough to stand on its own.
· A Canvas for Creativity: Use the fruits you love. Add different extracts, fold in whipped topping for extra fluff, or drizzle with chocolate. This recipe is a joyful template for your own creation.
Gathering Your Simple, Colorful Ingredients
The ingredient list is a joyful mix of pantry staples and freezer essentials. Using well-drained fruit is the key to success.
For the Creamy Base & Fruit:
· 1 (8 oz) package cream cheese, softened to room temperature: Full-fat is best for flavor and stability.
· 1 (14 oz) can sweetened condensed milk: This is the sweetener and the key to a smooth, creamy texture that doesn’t freeze rock-solid.
· 1 (20 oz) can fruit cocktail in juice or light syrup, VERY well drained: Drain in a colander, then press gently with paper towels.
· 1 (15 oz) can crushed pineapple in juice, VERY well drained: Squeeze in a clean kitchen towel or cheesecloth to remove as much liquid as possible.
· 1 (10 oz) jar maraschino cherries, drained and halved (reserve a few for garnish)
· 1 tablespoon maraschino cherry juice (from the jar): For a beautiful pink hue and extra flavor.
· 2 tablespoons lemon juice: Brightens all the flavors.
· 1 teaspoon vanilla extract
The Classic “Salad” Add-Ins (Choose Your Favorites):
· 1 cup mini marshmallows: For a classic, fluffy texture.
· ½ cup chopped pecans or walnuts, toasted: For essential crunch.
· ½ cup sweetened shredded coconut
For Serving (Optional):
· Whipped cream
· Fresh mint leaves
Ingredient Spotlight & Pro Swaps:
· The Draining Rule: This is the most important step. Excess liquid from the canned fruit will create ice crystals and a soupy texture. Drain thoroughly and pat dry.
· Fruit Flexibility: Feel free to use mandarin oranges (drained), fresh strawberries (chopped), blueberries, or bananas (add just before freezing to prevent browning).
· Lighter Option: You can use light cream cheese (Neufchâtel) and fat-free sweetened condensed milk. The texture will be slightly less rich but still delicious.
· For a Fluffier Texture: Fold in 1 (8 oz) container of thawed frozen whipped topping (like Cool Whip) after mixing the cream cheese and condensed milk. This creates an airier, lighter dessert.
Step-by-Step Instructions: Mix, Freeze, Slice, Smile
The process is wonderfully simple. The only hard part is waiting for it to freeze.
Step 1: Prep the Pan and Fruit.
Lightly grease a9x5 inch loaf pan (for a classic, sliceable shape) or an 8×8 square pan. You can also line it with plastic wrap or parchment paper for easier removal.
Drain all canned fruits meticulously.Spread the fruit cocktail and crushed pineapple on a double layer of paper towels and pat dry. Halve the cherries. Toasting the nuts, if using, is highly recommended for maximum flavor.
Step 2: Create the Creamy Base.
In a large mixing bowl,beat the softened cream cheese with an electric mixer until completely smooth and lump-free. Gradually beat in the sweetened condensed milk until the mixture is smooth and homogenous. Beat in the lemon juice, vanilla extract, and the tablespoon of cherry juice.
Step 3: Gently Fold in the Goodies.
Using a large rubber spatula,gently fold in the well-drained fruit cocktail, crushed pineapple, and halved cherries. If you are using any add-ins like mini marshmallows, toasted nuts, or coconut, fold them in now as well.
Step 4: Freeze Until Firm.
Pour the mixture into your prepared pan.Smooth the top with the spatula. Garnish the top with a few reserved cherry halves or a sprinkle of coconut/nuts for a pretty finish.
Cover the pan tightly with plastic wrap,pressing it directly onto the surface of the dessert to prevent freezer burn. Freeze for at least 6 hours, or preferably overnight, until completely firm.
Step 5: Slice and Serve.
About10-15 minutes before serving, remove the dessert from the freezer. Let it sit on the counter to soften slightly for easy slicing.
To serve,run a thin knife under warm water, dry it, and slice into squares or rectangles. If using a loaf pan, you can turn the whole block out onto a serving platter first. Serve with a dollop of whipped cream and a fresh mint leaf.
Pro Secrets: Tips for the Perfect Frozen Salad
· The “No-Ice-Crystal” Promise: Thoroughly drained fruit is non-negotiable. Taking the extra few minutes to pat the fruit dry is the single biggest factor in achieving a creamy, not icy, texture.
· Room Temp Cream Cheese: Ensure your cream cheese is truly softened. This prevents lumps and ensures a silky-smooth base.
· For Easy, Clean Slices: Use a sharp, thin-bladed knife. Run it under very hot water and wipe it dry between each slice for beautifully clean cuts.
· Make Individual Servings: For a fun party presentation, portion the mixture into a silicone muffin tin or small paper cups before freezing. Pop out for single-serving “frozen fruit cups.”
· The Fluffier “Salad” Variation: For the classic, ultra-light texture, fold in a full 8-ounce tub of thawed whipped topping after step 2, then proceed with folding in the fruit.
Serving Suggestions: A Cool Treat for Any Occasion
· The Potluck Star: Transport it in the pan, covered in foil, with a cooler pack. Slice and serve on a platter at the event.
· Elegant Dinner Party: Slice and plate individually with a delicate drizzle of raspberry sauce or a sprinkle of toasted almond slices.
· Summer BBQ: Serve it right alongside the pies and ice cream—it holds up better in the heat than traditional ice cream!
· Quick Sweet Treat: Keep a pan in the freezer and slice off a piece whenever a craving hits.
FAQs: Your Frozen Fruit Salad Questions, Answered
Q: How long does this keep in the freezer?
A:Wrapped tightly, it will keep for up to 2-3 weeks. After that, it may start to develop freezer frost or lose optimal texture.
Q: Can I use all fresh fruit?
A:You can, but fresh fruit has a much higher water content. If using fresh, macerate chopped fruit (like strawberries, peaches) with a little sugar for 30 minutes, then drain VERY well before using. Berries can be used frozen (do not thaw).
Q: My dessert is too hard to slice.
A:Simply let it sit at room temperature for a few more minutes. The sweetened condensed milk base ensures it won’t melt into a puddle; it will soften to a perfect, sliceable consistency.
Q: Can I make this dairy-free?
A:Yes! Use dairy-free cream cheese and a canned coconut sweetened condensed milk (available at most health food stores). The flavor will be slightly different but still delicious.
Q: Why did my dessert become icy/grainy?
A:This is almost always due to insufficiently drained fruit or over-stirring after adding the fruit, which can incorporate air and cause ice crystals. Ensure fruit is dry and fold gently.
The Final, Frosty Bite
The Frozen Fruit Salad Dessert is more than a recipe; it’s a time machine to simpler summers and shared joys. It’s a testament to the fact that the most beloved dishes are often those that solve a problem beautifully: how to create something impressive, refreshing, and communal with minimal effort.
Making it is an act of anticipation—knowing that a sweet, cool reward is waiting in the freezer. Sharing it is an act of generosity, offering a slice of nostalgia and refreshment. So, drain that fruit, beat that cream cheese, and make space in your freezer. Your new favorite, hassle-free summer tradition is waiting.
Did you make this vintage classic? Share your beautiful, colorful slices! Tag your photos on social media with #FrozenFruitSalad. We love seeing your retro revivals! Don’t forget to pin this recipe to your “No-Bake Desserts” and “Summer Recipes” boards.
Prep Time: 20 mins | Freeze Time: 6+ hours | Total Time: 6 hours 20 mins | Category: Dessert | Cuisine: American | Yield: 8-10 servings
Nutritional Information (Per serving, estimated): Calories: 280, Fat: 12g, Saturated Fat: 7g, Carbohydrates: 40g, Fiber: 1g, Sugar: 37g, Protein: 5g
More Recipes You Might Like
-

Cheesy Potato Patties 😋 – Crispy, Golden, and Irresistibly Cheesy If you’re looking for a high-RPM comfort food recipe that gets clicks, saves, and repeat cooks, Cheesy Potato Patties are a guaranteed winner. Crispy on the outside, soft and fluffy on the inside, and loaded with melty cheese—this recipe checks every box readers love: easy…
-

Brown Sugar Pineapple Ham Bake 😋 – The Ultimate Sweet & Savory Comfort Dish If you’re searching for a high-RPM, comfort-food recipe that people love clicking, saving, and cooking again and again, this Brown Sugar Pineapple Ham Bake is it. Sweet, sticky brown sugar. Juicy pineapple. Tender, savory ham. Baked together into one irresistible dish…
-

Angel Chicken Pasta – The Creamy Comfort Food That Everyone Loves
Few dishes feel as comforting, indulgent, and crowd-pleasing as Angel Chicken Pasta. This creamy, slow-cooked chicken pasta recipe has earned its name because it’s truly heavenly—rich, velvety sauce, tender chicken, and perfectly cooked pasta all coming together in one unforgettable meal. Angel Chicken Pasta is one of those recipes that never goes out of style.…