Discover the secret to the ultimate Old Fashioned Swiss Chocolate Cake! This moist chocolate cake recipe features rich layers, a silky cooked frosting, and easy from-scratch techniques. Perfect for birthdays, holidays, and becoming your new favorite classic dessert.
There’s a certain magic to a cake that needs no elaborate description, just a simple, evocative name: Old Fashioned Swiss Chocolate Cake. It conjures images of a bygone era—of handwritten recipe cards, of Sunday dinners, of a towering, decadent cake that was the undisputed star of any celebration. This isn’t just a chocolate cake; it’s a legacy in layers. A tender, deeply chocolaty crumb hugged by a uniquely smooth, almost fudge-like cooked frosting that glides over the tongue. It’s the classic dessert your grandmother might have made, the homemade birthday cake that feels like a hug, and the from-scratch baking project that yields pure, unadulterated joy.
In a world of trendy bakes, this cake stands as a testament to timeless perfection. Why “Swiss”? The name is believed to refer to the method of the frosting—a luxurious cooked mixture that resembles the silky fillings of Swiss confections. This recipe demystifies that process, guiding you to create a foolproof, moist layer cake that is both impressive and surprisingly approachable. It’s a make-ahead wonder, a crowd-pleasing masterpiece, and the answer to your search for the most satisfying, soul-warming chocolate cake of all time. Let’s bake a piece of history.
Why This Old Fashioned Cake Recipe Is a Cut Above
This cake earns its legendary status through time-tested techniques and a perfect balance of flavor and texture.
· The “Secret” to a Moist, Tender Crumb: The use of boiling water or hot coffee in the batter is the old-fashioned baker’s secret weapon. It “blooms” the cocoa powder, intensifying its flavor, and interacts with the flour’s gluten to create an exceptionally moist, soft, and tender cake that stays that way for days.
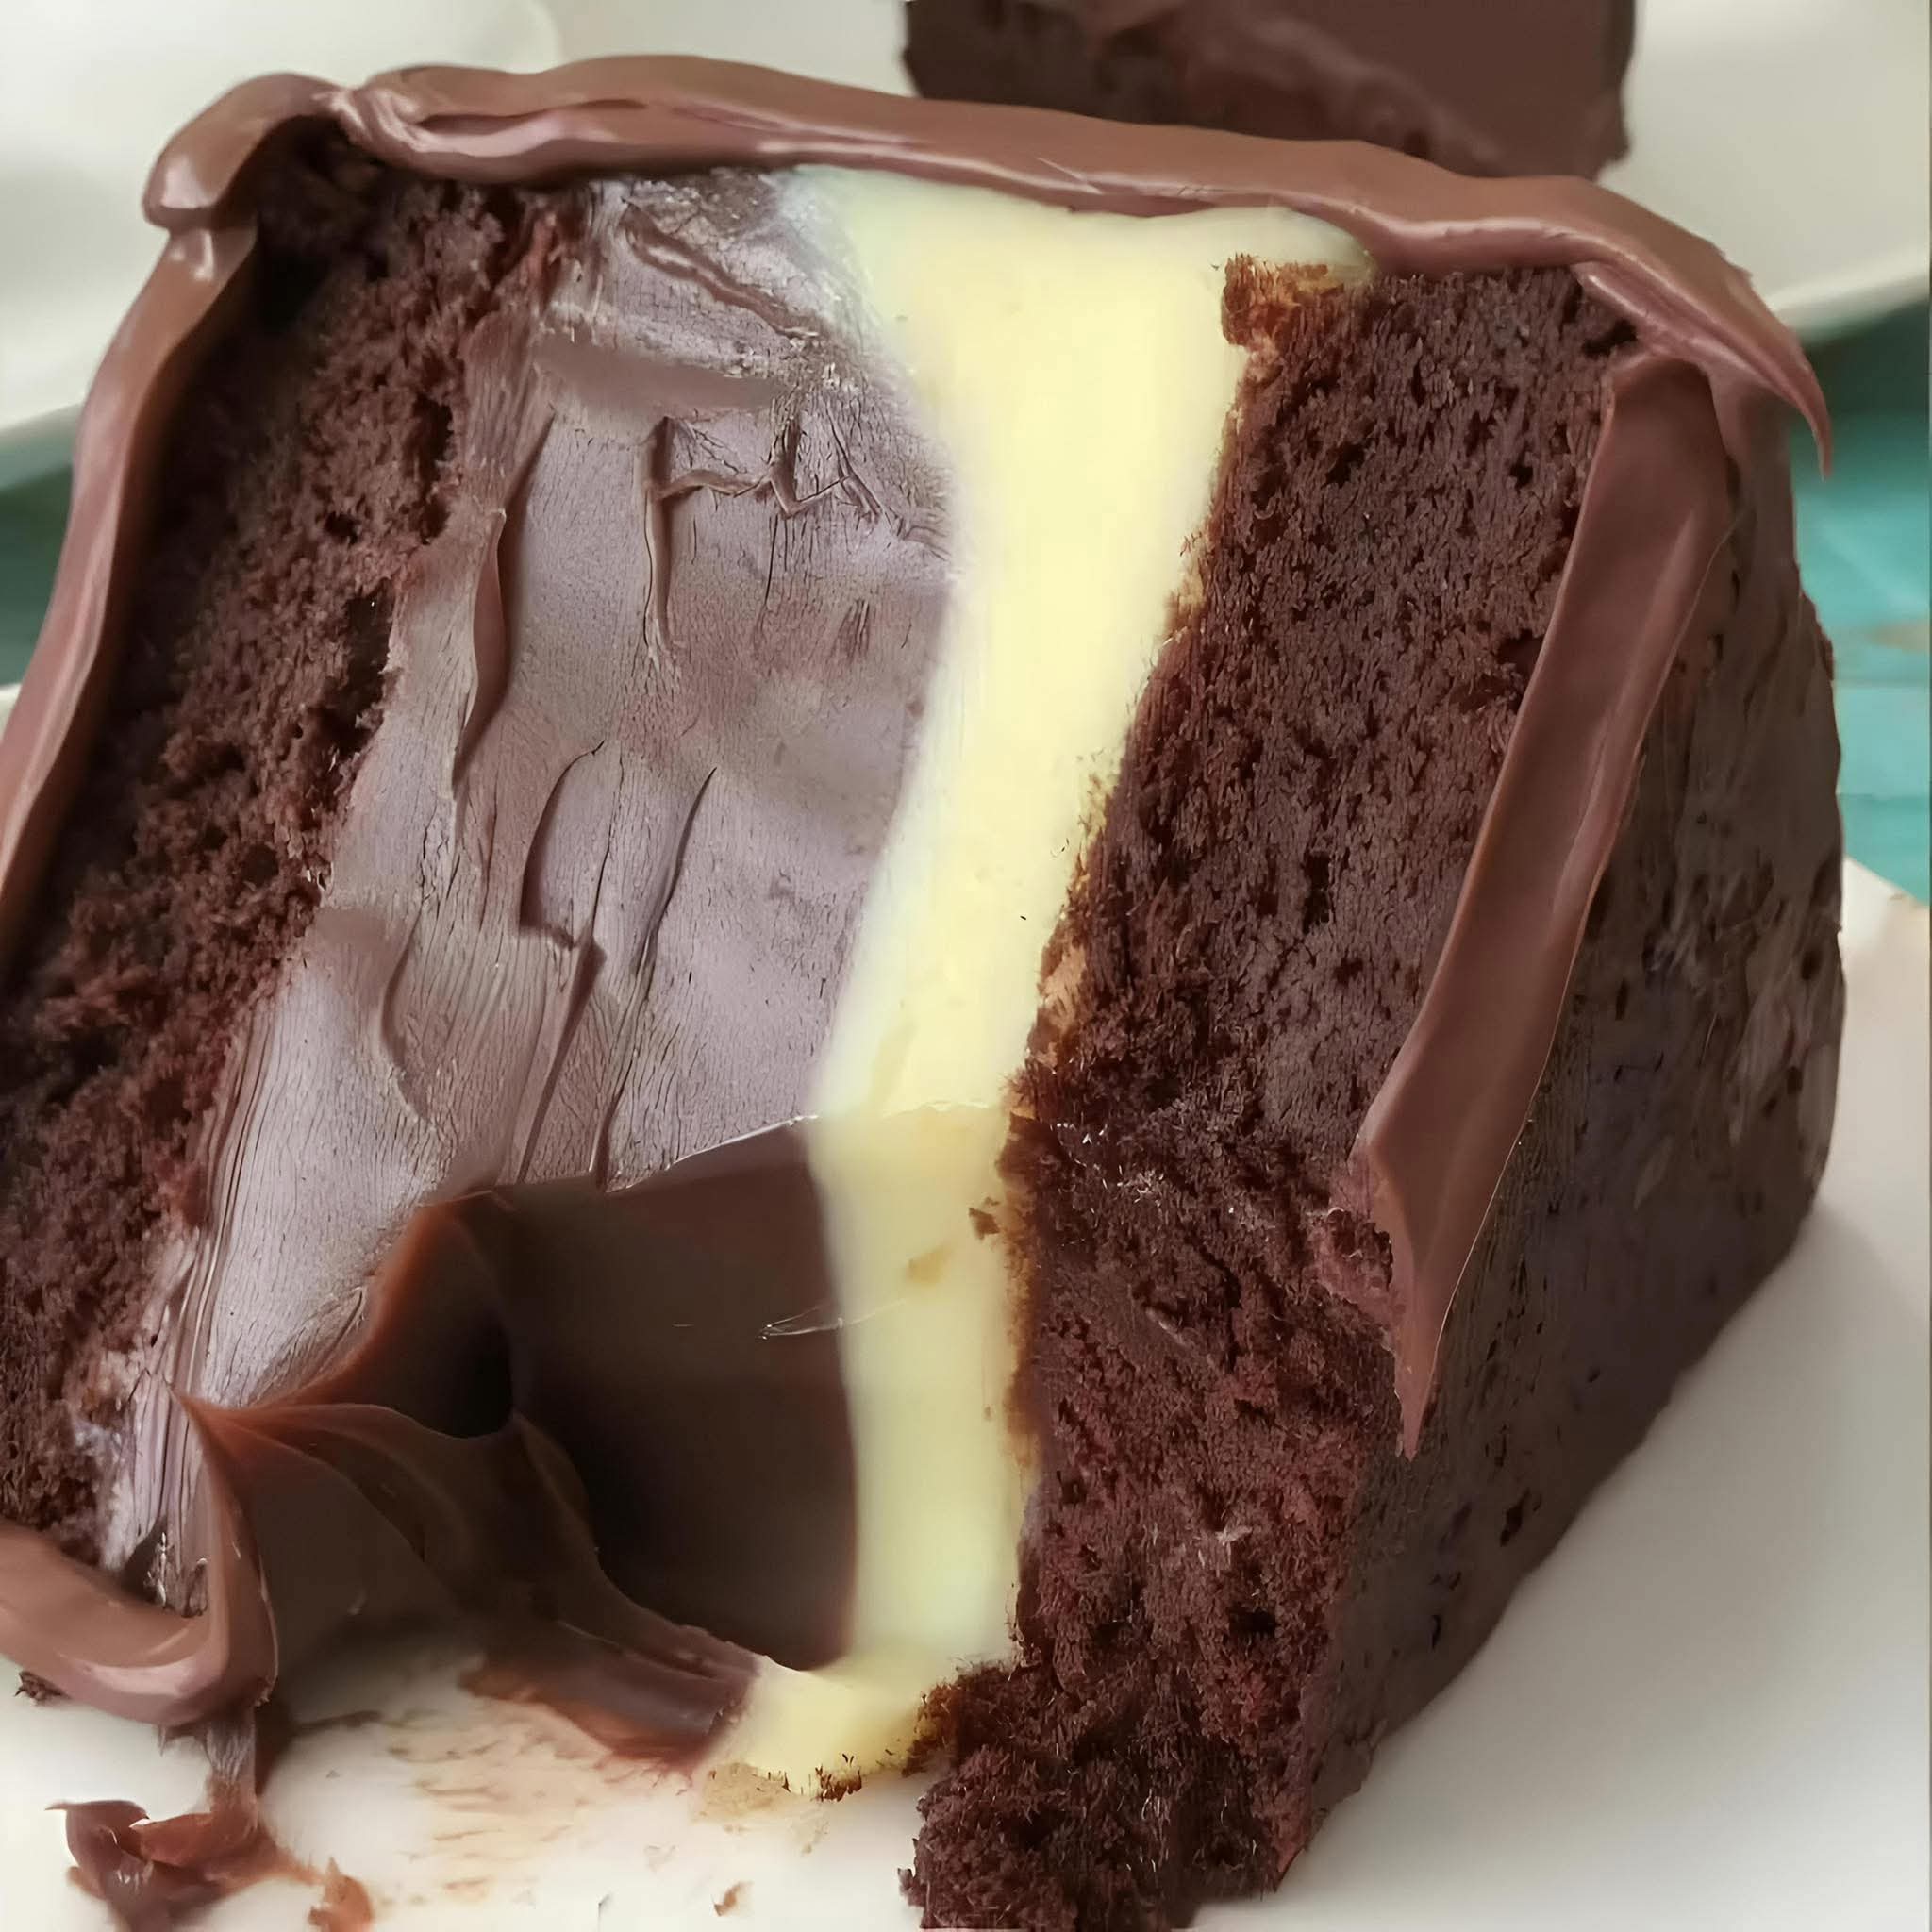
· The Cooked Frosting Revelation: Unlike buttercream or ganache, this cooked frosting (sometimes called “ermine” or “boiled milk frosting”) is a revelation. It’s luxuriously smooth, not overly sweet, and has a velvety, almost pudding-like consistency that pairs flawlessly with the rich cake. It’s a classic frosting that deserves a comeback.
· Built for Stability & Make-Ahead Ease: This cake’s structure is sturdy enough to hold tall layers and the substantial frosting, making it ideal for special occasion cakes. It also tastes profoundly better the next day, as the flavors meld and the moisture distributes, making it the ultimate stress-free dessert for entertaining.
· Pure, Uncomplicated Chocolate Intensity: With a focus on high-quality cocoa and simple pantry staples, this recipe delivers a profound chocolate flavor that is rich but not heavy, sophisticated but deeply comforting. It’s the perfect chocolate cake in its purest form.
Gathering Your Ingredients: The Foundation of Flavor
True to its name, this cake relies on humble, wholesome ingredients. Quality matters, especially for the cocoa.
For the Old Fashioned Chocolate Cake Layers:
· 2 cups (400g) Granulated Sugar
· 1 ¾ cups (220g) All-Purpose Flour, spooned and leveled
· ¾ cup (75g) High-Quality Unsweetened Cocoa Powder (Dutch-process or natural)
· 2 teaspoons Baking Soda
· 1 teaspoon Baking Powder
· 1 teaspoon Fine Sea Salt
· 2 large Eggs, at room temperature
· 1 cup (240ml) Buttermilk, at room temperature (or 1 cup milk + 1 Tbsp vinegar, rested 5 min)
· ½ cup (120ml) Vegetable Oil (or melted coconut oil)
· 2 teaspoons Pure Vanilla Extract
· 1 cup (240ml) Boiling Water or Strong Hot Brewed Coffee (coffee enhances chocolate flavor)
For the Silky Cooked Swiss Frosting:
· 1 ¼ cups (250g) Granulated Sugar
· ¼ cup (30g) All-Purpose Flour
· ¼ cup (25g) Unsweetened Cocoa Powder
· ¼ teaspoon Salt
· 1 ¼ cups (300ml) Whole Milk
· 1 cup (2 sticks / 226g) Unsalted Butter, softened to room temperature
· 1 teaspoon Pure Vanilla Extract
For Simple Assembly:
· Chocolate Shavings, Sprinkles, or a dusting of Cocoa Powder for garnish
Step-by-Step Instructions: Baking a Timeless Classic
Step 1: Prep and Preheat.
Preheat your oven to 350°F(175°C). Grease and flour two 9-inch round cake pans and line the bottoms with parchment paper rounds. This ensures flawless release.
Step 2: Whisk the Dry Ingredients.
In the bowl of a stand mixer or a large mixing bowl,sift together the sugar, flour, cocoa powder, baking soda, baking powder, and salt. Whisk thoroughly to combine and eliminate any lumps of cocoa. This aerates the mixture for a lighter cake.
Step 3: Combine the Wet Ingredients.
In a separate bowl or large measuring jug,whisk together the eggs, buttermilk, vegetable oil, and vanilla extract until smooth.
Step 4: Mix the Batter (The One-Bowl Wonder).
With the mixer on low speed,gradually add the wet ingredients to the dry ingredients. Mix just until combined—a few lumps are okay. Slowly and carefully, with the mixer still on low, pour in the boiling water or hot coffee. The batter will be very thin; this is normal and key to the moist texture. Mix just until smooth.
Step 5: Bake to Perfection.
Divide the thin batter evenly between the prepared pans.Bake for 30-35 minutes, or until a toothpick inserted into the center comes out clean or with a few moist crumbs. Do not overbake.
Step 6: Cool Completely.
Let the cakes cool in their pans for 15 minutes.Then, run a knife around the edges and invert them onto a wire rack. Peel off the parchment and allow the layers to cool completely before frosting. Pro-Tip: For easiest handling, wrap the cooled layers in plastic wrap and freeze for 1 hour. This minimizes crumbs.
Step 7: Make the Cooked Frosting.
This is a two-part process but is simple and rewarding.
· Cook the Base: In a medium saucepan, whisk together the sugar, flour, cocoa powder, and salt. Gradually whisk in the milk until smooth. Place over medium heat, cooking and whisking constantly until the mixture thickens to a very thick pudding consistency (about 5-8 minutes). It should coat the back of a spoon. Transfer to a clean bowl, press plastic wrap directly onto the surface, and chill until completely cool to the touch (about 1-2 hours).
· Whip into Frosting: In your stand mixer fitted with the paddle attachment, beat the softened butter on medium-high speed until pale and fluffy, about 3 minutes. With the mixer on low, gradually add the completely cooled cocoa-milk mixture, one large spoonful at a time, allowing each to incorporate fully. Once all is added, add the vanilla, increase speed to high, and whip for 3-5 minutes until the frosting is light, fluffy, and resembles a smooth, spreadable buttercream.
Step 8: Assemble and Frost.
Place one cake layer on your serving plate.Spread a generous amount of frosting evenly over the top. Place the second layer on top. Apply a thin “crumb coat” of frosting over the entire cake and chill for 15 minutes. Finally, apply the remaining frosting in a beautiful, swooping swirl over the top and sides. Garnish with chocolate shavings.
Step 9: Rest and Serve.
For the absolute best flavor and texture,cover the cake and let it rest at room temperature for 1 hour, then refrigerate for at least 4 hours, or ideally overnight. Slice with a warm knife.
Serving Suggestions: A Slice of Nostalgia
This cake is a complete experience on its own, but pairs beautifully.
· The Classic Slice: Serve at room temperature with a cold glass of milk or a hot coffee.
· À la Mode: A scoop of vanilla bean ice cream or freshly whipped cream adds a delightful contrast.
· Berry Accent: A few raspberries or strawberries on the side cut through the richness elegantly.
· Celebration Ready: It is the undisputed champion for birthday parties, anniversaries, and holiday dinners.
Pro Tips, Variations & Troubleshooting
· The Cocoa Choice: Dutch-process cocoa will yield a darker, mellower cake. Natural cocoa is more acidic and pairs well with the baking soda for a slightly sharper chocolate note. Both work; do not substitute one for the other without adjusting leavening.
· Buttermilk is Key: The acidity in buttermilk tenderizes the crumb. In a pinch, the milk + vinegar substitute works, but real buttermilk is best.
· Frosting Texture: Ensure the cooked base is completely cool before adding to the butter, or the frosting will melt and separate. If it does appear curdled, keep whipping—it will often come together.
· Customize Your Classic:
· Add Espresso: Use hot coffee in the batter for a deeper, more complex chocolate flavor.
· Mocha Frosting: Add 1 tsp of instant espresso powder to the frosting base.
· Add Fillings: Spread a layer of raspberry jam or cherry pie filling between the layers.
· Storage: Keep covered with a cake dome or in an airtight container in the refrigerator for up to 5 days. The frosting holds up beautifully.
Frequently Asked Questions (FAQ)
Q: Can I make this cake in a 9×13 pan?
A:Absolutely. Grease and flour a 9×13 inch pan. Bake at 350°F for 35-40 minutes. You can frost it right in the pan for an easy sheet cake.
Q: My cooked frosting turned out grainy. What happened?
A:This can happen if the sugar didn’t fully dissolve during the cooking phase. Ensure you whisk the milk mixture constantly over the heat until it’s completely smooth and thickened. Passing the cooked base through a fine-mesh sieve before chilling can also ensure smoothness.
Q: Can I use this frosting on cupcakes?
A:Yes, it pipes beautifully! Ensure it is well-chilled and whipped to stiff peaks. It’s perfect for chocolate cupcakes.
Q: Is this cake freezer-friendly?
A:Yes. Freeze unfrosted, wrapped layers for up to 3 months. Thaw overnight in the fridge. The frosted cake can also be frozen, though the frosting texture is best fresh. Freeze the whole cake solid, then wrap tightly in plastic and foil.
Conclusion: The Cake That Connects Generations
The Old Fashioned Swiss Chocolate Cake is more than a dessert; it’s an heirloom. It’s the taste of care, the embodiment of celebration, and proof that the best recipes are those that stand the test of time. Baking it is an act of love—a connection to bakers of the past and a gift to those who will gather around your table today.
It doesn’t rely on fleeting trends or complicated techniques. Its power lies in its honest, delicious simplicity. So, preheat your oven, sift that cocoa, and prepare to create a new-old favorite. This is the cake that builds traditions, one perfect, moist, chocolatey slice at a time.
We know this will become a treasured recipe in your home. When you make it, share a photo of your beautiful creation and tag it #SwissChocolateCake. For more classic dessert recipes and baking from scratch guides, explore our full collection. Happy baking
More Recipes You Might Like
-

Cheesy Potato Patties 😋 – Crispy, Golden, and Irresistibly Cheesy If you’re looking for a high-RPM comfort food recipe that gets clicks, saves, and repeat cooks, Cheesy Potato Patties are a guaranteed winner. Crispy on the outside, soft and fluffy on the inside, and loaded with melty cheese—this recipe checks every box readers love: easy…
-

Brown Sugar Pineapple Ham Bake 😋 – The Ultimate Sweet & Savory Comfort Dish If you’re searching for a high-RPM, comfort-food recipe that people love clicking, saving, and cooking again and again, this Brown Sugar Pineapple Ham Bake is it. Sweet, sticky brown sugar. Juicy pineapple. Tender, savory ham. Baked together into one irresistible dish…
-

Angel Chicken Pasta – The Creamy Comfort Food That Everyone Loves
Few dishes feel as comforting, indulgent, and crowd-pleasing as Angel Chicken Pasta. This creamy, slow-cooked chicken pasta recipe has earned its name because it’s truly heavenly—rich, velvety sauce, tender chicken, and perfectly cooked pasta all coming together in one unforgettable meal. Angel Chicken Pasta is one of those recipes that never goes out of style.…