Imagine a dessert so universally loved, so effortlessly simple, and so deliciously satisfying that it appears at every potluck, family reunion, and holiday table for decades, never losing its crowd-pleasing power. That’s Cream Cheese Squares. This iconic dessert is the ultimate easy, no-fuss treat—a perfect harmony of a buttery, crisp crust, a rich and tangy cream cheese filling, and a sweet, often fruity or crumbly topping. Whether you know them as cheesecake squares, magic cookie bars, or simply “that dessert Grandma makes,” these bars are a bite-sized piece of pure comfort.
More than just a recipe, Cream Cheese Squares are a formula for success. They come together with minimal ingredients, require no special skills, and are virtually foolproof. They’re the answer to the question, “What can I bring that everyone will eat?” and the solution to a last-minute dessert emergency. With variations ranging from classic cherry-topped to decadent chocolate chip, this versatile base is a blank canvas for creativity. Let’s dive into the magic of making these legendary bars.
Why Cream Cheese Squares Deserve a Permanent Spot in Your Recipe Box
This recipe earns its legendary status through sheer reliability and crowd-pleasing deliciousness. Here’s what makes it a keeper:
· Minimal Effort, Maximum Reward: With a simple press-in crust and a mix-and-pour filling, this is the epitome of an easy dessert recipe. It’s a beginner-friendly baking project with professional results.
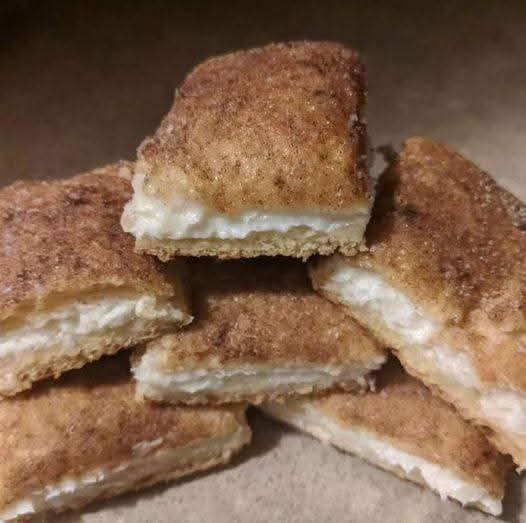
· The Perfect Texture Trio: The best versions offer a crisp, buttery base, a smooth, dense-creamy middle, and a contrasting topping (be it fruit, crumbs, or glaze) for a perfect bite every time.
· Make-Ahead & Travels Like a Dream: These squares need to chill, making them the ultimate stress-free potluck dessert. They hold their shape beautifully and taste even better the next day.
· Wildly Customizable: One base recipe can become a dozen different desserts. Change the crust, flavor the filling, or swap the topping to match any season or craving.
· Crowd-Feeding & Cost-Effective: A single 9×13 pan yields 20+ generous squares, making it perfect for feeding a crowd on a budget.
Understanding the Layers: The Anatomy of a Perfect Square
The magic lies in the distinct layers that work in harmony:
The Foundation: The Crust. Usually a simple mix of graham cracker crumbs, sugar, and melted butter. Pressed firmly, it bakes into a sturdy, sweet base that contrasts the creamy filling. Variations use vanilla wafers, shortbread, or even cookie dough.
The Star: The Cream Cheese Filling. This is a simplified cheesecake batter: cream cheese, sugar, eggs, and vanilla. Beating the cream cheese until perfectly smooth is the key to a luxuriously creamy layer without lumps. Some recipes include a touch of lemon for brightness.
The Crown: The Topping. This is where personality shines. It could be a can of pie filling (cherry or blueberry), a streusel crumb, a layer of chocolate chips, or a simple dusting of powdered sugar. It adds visual appeal and a final layer of flavor and texture.
Classic Cherry Cream Cheese Squares Recipe
Prep Time: 15 minutes
Cook Time:35-40 minutes
Chill Time:4 hours (minimum)
Total Time:About 5 hours
Yield:One 9×13 pan (24 squares)
Difficulty:Easy
Ingredients:
For the Graham Cracker Crust:
· 2 cups (200g) graham cracker crumbs (about 14-15 full sheets)
· ⅓ cup (67g) granulated sugar
· ½ cup (113g / 1 stick) unsalted butter, melted
For the Cream Cheese Filling:
· 2 (8 oz) blocks full-fat cream cheese, softened to room temperature
· ½ cup (100g) granulated sugar
· 2 large eggs, at room temperature
· 1 teaspoon pure vanilla extract
· 1 teaspoon lemon juice (optional, but recommended)
For the Topping:
· 1 (21 oz) can cherry pie filling (or blueberry, apple, etc.)
Equipment:
· 9×13 inch baking pan
· Electric hand mixer or stand mixer
· Medium and large mixing bowls
· Spatula
Step-by-Step Instructions:
Prep and Preheat.
Preheat your oven to 350°F(175°C). For easy removal, line your 9×13 pan with parchment paper, leaving an overhang on two sides.
Make the Press-In Crust.
In a medium bowl,stir the graham cracker crumbs and sugar together. Pour the melted butter over and mix until all crumbs are evenly moistened and the mixture resembles wet sand.
Pour the crumbs into your prepared pan.Using the bottom of a measuring cup or glass, press the mixture firmly and evenly into the bottom of the pan to form a solid crust layer. Bake for 10 minutes. Remove and let cool slightly while you make the filling. Leave the oven on.
Prepare the Cream Cheese Filling.
In a large bowl,using an electric mixer, beat the softened cream cheese on medium speed until completely smooth and creamy, about 2 minutes. Scrape down the sides.
Add the sugar and beat again until combined.Add the eggs, one at a time, beating on low speed after each addition until just incorporated. Do not overmix. Finally, beat in the vanilla and lemon juice until the filling is smooth and uniform.
Assemble and Bake.
Pour the cream cheese filling over the warm crust,spreading it into an even layer.
Bake for 25-30 minutes,or until the edges are lightly puffed and set, and the center only has a slight, gentle jiggle when you shake the pan. It will firm up as it cools.
Top and Chill.
Remove the pan from the oven and place it on a wire rack.Let it cool completely at room temperature, about 1 hour.
Once cool,spread the can of cherry pie filling evenly over the top. Cover the pan with plastic wrap and refrigerate for at least 4 hours, or preferably overnight. This chilling step is crucial for clean slicing and perfect texture.
Slice and Serve.
Use the parchment paper overhang to lift the entire slab out of the pan.Place on a cutting board. Use a sharp knife dipped in hot water (wiped dry) to cut into 24 squares. Wipe the knife clean between cuts for perfect edges.
Serve chilled.
Pro Tips for Flawless Squares Every Time
· Room Temperature is Key: Softened cream cheese and room-temperature eggs blend smoothly and evenly, preventing a lumpy filling and ensuring even baking.
· Press the Crust FIRMLY: A well-compacted crust is essential. It needs to be solid enough to cut through cleanly and support the creamy layer without becoming soggy.
· Don’t Overmix After Adding Eggs: Once the eggs are in the filling, mix on low speed and only until combined. Over-beating incorporates too much air, which can lead to cracking and an uneven texture.
· The Perfect Bake: The squares are done when the edges look set but the center still has a slight wobble. Overbaking will cause cracking and a dry, rubbery texture.
· Patience with Chilling: Rushing the chill is the #1 mistake. The filling needs time to fully set for the ideal creamy, sliceable consistency.
Incredible Variations to Make It Your Own
· Lemon Cream Cheese Squares: Add the zest of one lemon to the filling. Top with a simple lemon glaze (powdered sugar + lemon juice) instead of fruit.
· Chocolate Chip Cream Cheese Squares: Fold 1 cup of mini chocolate chips into the filling before pouring over the crust.
· Pumpkin Spice Squares: Replace one block of cream cheese with 1 cup of pumpkin puree and add 1 tsp of pumpkin pie spice to the filling.
· Saltine Cracker Toffee Version (The Viral “Icebox Cake”): Layer salted saltine crackers on the crust, pour a hot boiled mixture of butter and brown sugar over them, then spread the cream cheese filling on top before baking. A cult favorite!
· No-Bake Version: Use a pre-made graham cracker crust. Whip the filling (with a bit of powdered sugar and whipped topping folded in) and spoon it in. Chill and top with fruit. No oven required.
· Gluten-Free: Use certified gluten-free graham-style crackers for the crust.
Serving, Storing & Freezing
Serving: These are perfect straight from the fridge. For an elegant touch, garnish with a dollop of whipped cream or a fresh mint leaf.
Storing: Keep covered tightly with plastic wrap or in an airtight container in the refrigerator for up to 5 days.
Freezing: Freeze the un-topped, baked and cooled squares tightly wrapped for up to 3 months. Thaw overnight in the fridge, then add the pie filling or topping just before serving.
Frequently Asked Questions (FAQs)
Q: Can I use low-fat or Neufchâtel cream cheese?
A:You can, but the filling will be less rich, slightly less creamy, and may bake with a softer set. For the best texture and flavor, full-fat cream cheese is highly recommended.
Q: My filling cracked. What did I do wrong?
A:Cracking is usually caused by overbaking, overmixing the eggs (which adds too much air), or a too-rapid temperature change. Ensure you follow the baking time (a slight jiggle is good) and cool the pan on a rack before refrigerating.
Q: Can I use a different crust?
A:Absolutely! Vanilla wafer crumbs, shortbread cookie crumbs, or even a press-in sugar cookie dough make fantastic crusts.
Q: Do I have to use pie filling? Can I use fresh fruit?
A:Pie filling is thick and holds its shape. Fresh fruit (like berries) will release juice and make the top layer wet. If using fresh, toss berries with a tablespoon of cornstarch and a little sugar first, or make a quick compote.
Q: Can I make these in individual portions?
A:Yes! Use a muffin tin lined with paper liners. Press crust into the bottom, fill ⅔ full with batter, and bake for 18-22 minutes. Top once cool.
Conclusion: The Timeless Treat That Always Delivers
Cream Cheese Squares are more than a recipe—they’re a shared culinary memory, a token of hospitality, and a testament to the fact that the simplest things are often the best. They represent the joy of baking something everyone will enjoy without stress or complication.
So, keep cream cheese and graham crackers on hand. With this trusty recipe, you’re always just a few steps away from a pan of sweet, creamy, utterly satisfying squares that promise to bring a smile with every bite.
What’s your favorite variation? Do you have a family twist on this classic? Share your stories and creations in the comments below!
More Recipes You Might Like
-

Cheesy Potato Patties 😋 – Crispy, Golden, and Irresistibly Cheesy If you’re looking for a high-RPM comfort food recipe that gets clicks, saves, and repeat cooks, Cheesy Potato Patties are a guaranteed winner. Crispy on the outside, soft and fluffy on the inside, and loaded with melty cheese—this recipe checks every box readers love: easy…
-

Brown Sugar Pineapple Ham Bake 😋 – The Ultimate Sweet & Savory Comfort Dish If you’re searching for a high-RPM, comfort-food recipe that people love clicking, saving, and cooking again and again, this Brown Sugar Pineapple Ham Bake is it. Sweet, sticky brown sugar. Juicy pineapple. Tender, savory ham. Baked together into one irresistible dish…
-

Angel Chicken Pasta – The Creamy Comfort Food That Everyone Loves
Few dishes feel as comforting, indulgent, and crowd-pleasing as Angel Chicken Pasta. This creamy, slow-cooked chicken pasta recipe has earned its name because it’s truly heavenly—rich, velvety sauce, tender chicken, and perfectly cooked pasta all coming together in one unforgettable meal. Angel Chicken Pasta is one of those recipes that never goes out of style.…