Let’s be honest: the holiday season (or any day that calls for a sweet treat) is busy enough without complicated candy thermometers, precise temperatures, and recipes that leave you with a gritty, grainy mess. What if you could make incredibly rich, smooth, and decadent fudge with just three ingredients, one bowl, and about three minutes of active work? This legendary 3 Minute Fudge recipe is not just a trick; it’s a lifesaver. If you need a last-minute dessert, a simple holiday gift, or a kid-friendly cooking project that guarantees success, do not lose this recipe. It’s the easiest fudge recipe you’ll ever own, and it’s absolutely impossible to mess up.
This magic hinges on one iconic ingredient: sweetened condensed milk. It’s the pre-cooked, creamy, sugary base that replaces hours of stovetop simmering. Paired with quality chocolate chips, it transforms into a silky-smooth confection that sets up perfectly. This is the ultimate no-fuss candy recipe, the one you’ll memorize and pass down because it always works, always impresses, and always tastes like a rich, chocolatey hug. Consider this your official permission to skip the fuss and embrace the easiest path to homemade candy glory.
Why This 3 Minute Fudge Recipe is a Non-Negotiable Keeper
In a world of finicky desserts, this fudge stands as a pillar of reliability and delicious simplicity.
· True 3-Minute Active Time: From opening the can to scraping the bowl into the pan, it genuinely takes about 180 seconds. It’s the quickest dessert you can make.
· Absolutely Foolproof: No tempering chocolate, no testing soft-ball stage. If you can microwave and stir, you can make perfect fudge. It’s a beginner-friendly candy that builds kitchen confidence.
· Endlessly Customizable: Once you master the base, a universe of variations opens up: peppermint, peanut butter, rocky road, cookies and cream—the possibilities are endless.
· Perfect for Gifting: It looks professional, tastes luxurious, and is made with love. It’s a thoughtful homemade gift for neighbors, teachers, and friends.
· Pantry-Staple Ingredients: You likely have the three main ingredients in your cupboard right now, making it the perfect emergency dessert.
The Magic Trio: A Deep Dive into Your 3 Ingredients
The simplicity is brilliant. Each ingredient has one critical job.
Sweetened Condensed Milk (1 can, 14 oz): This is the magic ingredient. It’s milk that has been cooked down with sugar until thick, sweet, and shelf-stable. It provides the creamy body, sweetness, and structure for the fudge, acting as both the liquid and the sugar component. Do not substitute evaporated milk; it will not work.
Semi-Sweet Chocolate Chips (3 cups / 18 oz): The flavor star. Using a good quality brand like Guittard, Ghirardelli, or Nestlé Toll House matters here, as it’s the primary flavor. Semi-sweet strikes the perfect balance between sweet and bitter. You can use milk chocolate for a sweeter fudge or dark chocolate for a more intense, adult version. Pro Tip: For the absolute smoothest texture, use high-quality chocolate bars chopped into uniform pieces instead of chips. Chips have stabilizers to hold their shape, while bar chocolate melts more silkily.
Pure Vanilla Extract (1 teaspoon): The flavor enhancer. It rounds out the chocolate flavor, adds depth, and cuts the sweetness slightly. Always use pure vanilla extract, not imitation. For a fun twist, try almond extract, peppermint extract, or orange extract.
Step-by-Step Instructions for Perfect Fudge Every Time
The process is simple, but following these steps ensures a flawless set and texture.
Phase 1: The Melt (The Only “Cooking” Step)
Combine & Microwave: In a large, microwave-safe bowl, pour the entire can of sweetened condensed milk over the 3 cups of chocolate chips. Microwave on high power in 30-second intervals. After each interval, remove the bowl (carefully, it may be hot) and stir vigorously.
Stir to Smoothness: Continue microwaving and stirring until the chocolate is completely melted and the mixture is smooth, glossy, and uniform. This typically takes 3-4 intervals (about 90-120 seconds total). Do not over-microwave, as you can burn the chocolate. The residual heat will continue to melt any last lumps as you stir.
Phase 2: The Stir & Flavor
Add Vanilla & Vigorously Stir: Once smooth, immediately stir in the vanilla extract. Now, stir the mixture with conviction for another 30-60 seconds. This final stirring is crucial for encouraging the emulsion to set up with a perfect, creamy texture later.
Phase 3: The Set & Slice
Spread in Pan: Quickly pour and spread the thick fudge mixture into an 8×8-inch baking pan that has been lined with parchment paper or aluminum foil, leaving an overhang on two sides for easy removal. Spread it into an even layer with a spatula.
Chill to Set: Refrigerate the pan for at least 2 hours, or until the fudge is completely firm. For the cleanest cuts, you can let it set overnight.
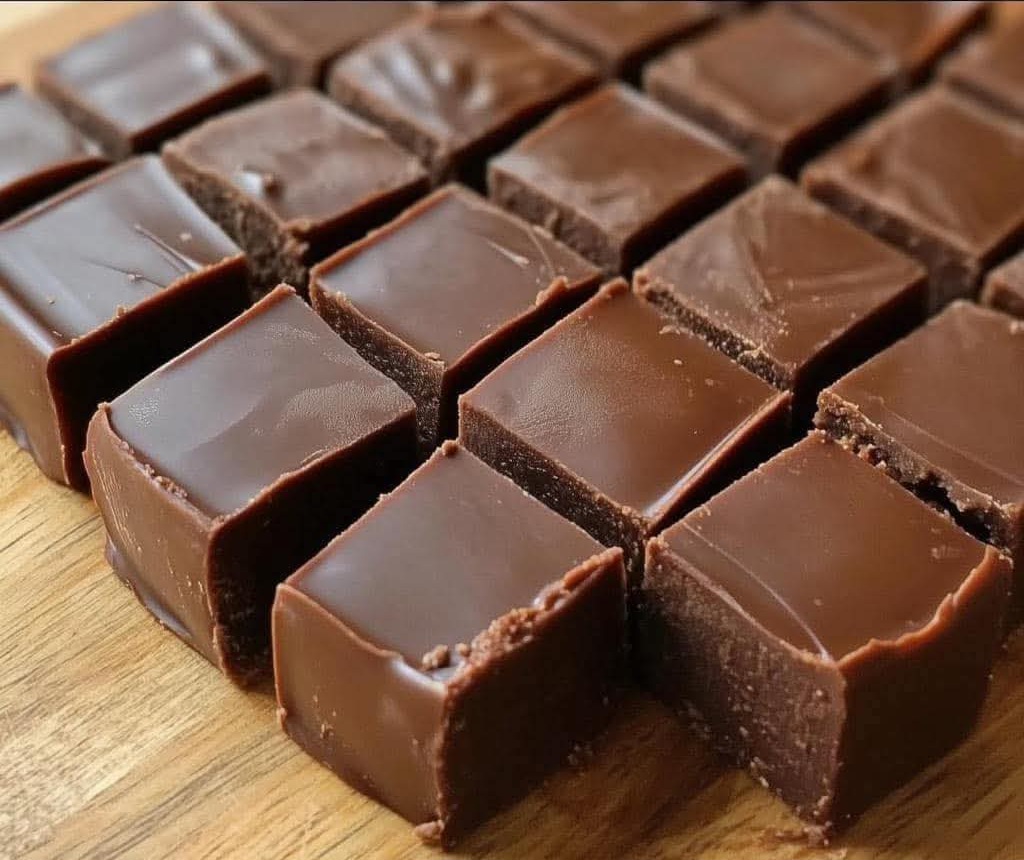
Slice and Serve: Use the parchment paper “handles” to lift the entire slab of fudge out of the pan. Place it on a cutting board. Using a large, sharp knife (wiped clean between cuts for neat edges), cut into 1-inch squares.
5 Can’t-Miss Variations to Make It Your Own
This base recipe is your canvas. Get creative with these easy stir-ins added right before pouring into the pan.
Classic Rocky Road: Fold in 1 cup mini marshmallows and 1 cup chopped walnuts or pecans.
Festive Peppermint Crush: Substitute ½ tsp of peppermint extract for the vanilla. Stir in ½ cup of crushed candy canes or peppermint candies.
Peanut Butter Paradise: Swirl in ½ cup of warmed creamy peanut butter after spreading the fudge in the pan. Use a knife to create a marbled effect.
Cookies & Cream: Fold in 1½ cups of broken sandwich cookie pieces (like Oreos).
Salted Caramel Pretzel: Layer the bottom of the pan with 1 cup of small pretzel pieces before pouring in the fudge. Sprinkle the top with flaky sea salt after spreading.
Serving, Gifting & Storage Tips
This fudge is meant to be shared and savored.
· Serving: Serve small squares at room temperature for the softest, creamiest texture. Pair with coffee or a glass of cold milk.
· Gifting: Stack squares in a clear cellophane bag tied with a ribbon, or layer them in a festive tin between sheets of parchment paper. A handmade label adds a beautiful personal touch.
· Storage: Store in an airtight container in the refrigerator for up to 2 weeks. It can also be frozen for up to 3 months; thaw overnight in the fridge. The fudge is best enjoyed within a week for optimal texture and flavor.
Frequently Asked Questions (FAQ)
Q: Can I make this on the stovetop instead of the microwave?
A: Absolutely.Combine the milk and chocolate chips in a heatproof bowl set over a saucepan of barely simmering water (double boiler). Stir constantly until melted and smooth, then proceed with the recipe.
Q: My fudge is too soft and won’t set. What happened?
A:The most common reason is not using enough chocolate chips. Always measure by weight (18 oz) if possible, or fluff your chocolate chips in the bag before gently spooning them into a measuring cup. Under-stirring can also affect the set. Ensure you stir vigorously after melting.
Q: Can I use white chocolate chips?
A: Yes!White chocolate fudge is delicious. Use 3 cups of high-quality white chocolate chips and consider adding 1 cup of dried cranberries for a festive touch.
Q: Why did my fudge get a grainy texture?
A:Graininess is usually caused by two things: 1) Getting even a single drop of water in the mixture while melting, or 2) Overheating/scorching the chocolate. Use a completely dry bowl and microwave in short bursts.
Q: How do I get those pretty, clean cuts?
A:The secrets are: 1) Let it chill fully, preferably overnight. 2) Use a large, sharp chef’s knife. 3) Wipe the knife clean with a hot, damp cloth between each cut. 4) For super sharp corners, dip the knife in hot water, dry it, and then cut.
Conclusion: The Recipe You’ll Treasure Forever
In a culinary world that often prizes complexity, this 3 Minute Fudge is a powerful reminder that some of the very best things are also the simplest. It’s a recipe that delivers unadulterated joy with minimal effort, a treat that connects generations in the kitchen, and a guaranteed success that will make you feel like a confectionery genius. Truly, don’t lose this recipe—it’s a keeper in every sense of the word.
I’d love to see your creations! What variation did you try? How did you gift it? Share your beautiful fudge squares and tag your photos #My3MinuteFudge. And when you need another no-bake hero, try my 5-Minute Magic Peanut Butter Balls—they’re just as easy and equally irresistible!
3 Minute Fudge – Don’t LOSE this Recipe
Prep Time: 3 mins | Chill Time: 2 hours | Total Time: 2 hours 3 mins | Yield: 64 one-inch squares
Course: Dessert, Candy | Cuisine: American
Keywords: 3 minute fudge, easiest fudge recipe, 3 ingredient fudge, microwave fudge, holiday candy, Christmas fudge, last minute dessert, no bake dessert, easy homemade gifts, foolproof candy, sweetened condensed milk fudge
Description: The world’s easiest, most foolproof fudge! With just 3 ingredients and 3 minutes of work, you get rich, creamy, decadent homemade fudge that’s perfect for gifts, holidays, or any sweet craving.
Ingredients:
· 1 can (14 oz) sweetened condensed milk
· 3 cups (18 oz) high-quality semi-sweet chocolate chips
· 1 teaspoon pure vanilla extract
· Optional: Pinch of salt, nuts, sprinkles, etc.
Instructions:
Melt: In a large microwave-safe bowl, combine sweetened condensed milk and chocolate chips. Microwave in 30-second intervals, stirring vigorously after each, until completely smooth and glossy (about 90-120 seconds total).
Stir: Immediately stir in vanilla extract (and any optional stir-ins like nuts). Beat the mixture by hand for 30-60 seconds until very smooth and thickened slightly.
Set: Pour into an 8×8-inch pan lined with parchment paper. Spread evenly.
Chill: Refrigerate for at least 2 hours, or until completely firm.
Slice: Lift fudge from pan using parchment paper. Cut into 1-inch squares with a sharp knife. Store in an airtight container in the fridge.
Notes:
· Quality Matters: Use good chocolate chips for the best flavor and texture.
· Stir Vigorously: The final minute of stirring by hand is key for the perfect creamy set.
· Variations: See main article for Rocky Road, Peppermint, Peanut Butter, and other easy flavor ideas!
· Gifting: This fudge stacks and ships beautifully, making it an ideal homemade gift.
More Recipes You Might Like
-

Cheesy Potato Patties 😋 – Crispy, Golden, and Irresistibly Cheesy If you’re looking for a high-RPM comfort food recipe that gets clicks, saves, and repeat cooks, Cheesy Potato Patties are a guaranteed winner. Crispy on the outside, soft and fluffy on the inside, and loaded with melty cheese—this recipe checks every box readers love: easy…
-

Brown Sugar Pineapple Ham Bake 😋 – The Ultimate Sweet & Savory Comfort Dish If you’re searching for a high-RPM, comfort-food recipe that people love clicking, saving, and cooking again and again, this Brown Sugar Pineapple Ham Bake is it. Sweet, sticky brown sugar. Juicy pineapple. Tender, savory ham. Baked together into one irresistible dish…
-

Angel Chicken Pasta – The Creamy Comfort Food That Everyone Loves
Few dishes feel as comforting, indulgent, and crowd-pleasing as Angel Chicken Pasta. This creamy, slow-cooked chicken pasta recipe has earned its name because it’s truly heavenly—rich, velvety sauce, tender chicken, and perfectly cooked pasta all coming together in one unforgettable meal. Angel Chicken Pasta is one of those recipes that never goes out of style.…