This Coconut Cream Dream Cake recipe is the ultimate easy dessert! Moist coconut cake, creamy coconut filling, fluffy whipped cream frosting & toasted coconut. Perfect for Easter dessert, summer parties, or any special occasion cake that needs a wow factor.
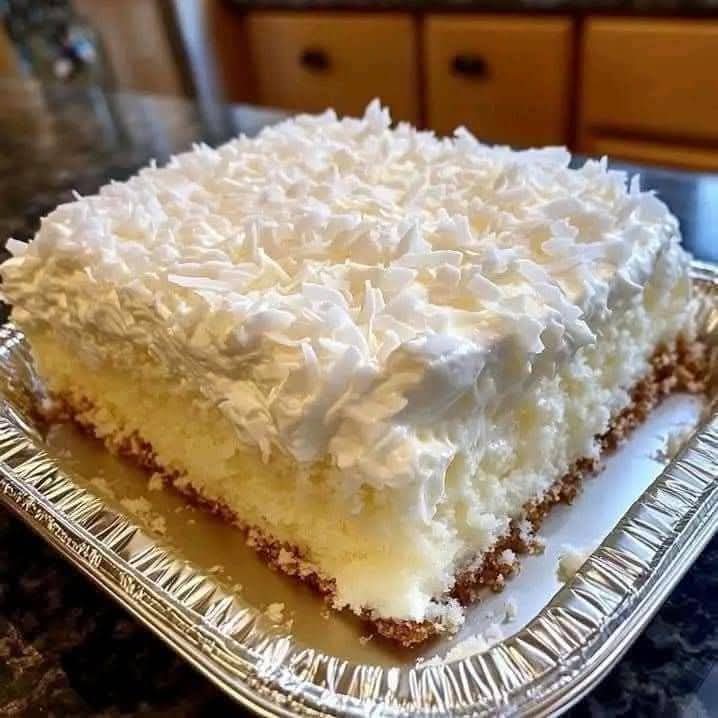
Close your eyes and imagine the most luscious, tropical escape you can have on a dessert plate. A cloud-like, impossibly moist coconut cake, layered with a rich and creamy coconut pastry cream, all enveloped in a billowy blanket of fresh whipped cream and a blizzard of toasted coconut. This isn’t just a cake; it’s a slice of paradise, a Coconut Cream Dream made real.
For too long, stunning layer cakes have felt like the exclusive domain of expert bakers. This recipe shatters that notion. By starting with a doctored box mix, we build a foundation of incredible flavor and texture with minimal effort, freeing you to focus on the show-stopping fillings and frostings. The result? A cake that tastes completely homemade and looks like it came from a high-end bakery, but is surprisingly simple to assemble.
Whether you’re celebrating a birthday, bringing the centerpiece to a potluck, or just conjuring a little weekday magic, this cake is your answer. It’s a make-ahead marvel, a crowd-pleasing masterpiece, and a family favorite in the making. Let’s turn that dreamy vision into your new signature dessert.
Why This Coconut Cream Dream Cake Recipe is Unbeatable
This cake earns its “dream” title through clever techniques and flawless flavor pairing.
· The Secret to a Moist, Flavor-Packed “Semi-Homemade” Cake: Swapping the box mix’s water for milk and adding an extra egg and coconut cream transforms a simple mix into a tender, rich cake with a subtle coconut essence that perfectly supports the other components. It’s the ultimate baking hack for a quick dessert that doesn’t taste like a shortcut.
· The Triple Coconut Threat: We attack the senses with coconut in three distinct forms: extract in the cake for fragrance, cream in the filling for luxurious body, and toasted flakes on the exterior for crunch and deep, nutty flavor. This layering creates a complex coconut experience.
· The Perfect Textural Symphony: The tender crumb of the cake, the smooth, pudding-like filling, the light-as-air frosting, and the crispy toasted coconut create a textural journey in every single bite. It’s rich yet refreshing, substantial yet delicate.
· Stability & Make-Ahead Genius: The whipped cream frosting is stabilized, meaning it won’t weep or deflate, even after hours in the fridge. This cake actually benefits from chilling overnight, allowing the flavors to meld, making it the ultimate stress-free dessert for entertaining.
Gathering Your Ingredients: Building Blocks of a Dream
Quality matters, especially in a recipe where each component shines. Here’s your roadmap to coconut bliss:
For the Super-Moist Coconut Cake:
· 1 box (15.25 oz) White Cake Mix (Duncan Hines Classic White is highly recommended for its fine crumb)
· 3 large Eggs, at room temperature
· 1 cup Whole Milk (or full-fat coconut milk for an intense boost)
· ½ cup Vegetable Oil (or melted coconut oil for more coconut flavor)
· 1 teaspoon Coconut Extract (or clear vanilla extract if you can’t find coconut)
· Optional: ½ cup sweetened shredded coconut, finely pulsed in a food processor
For the Luscious Coconut Cream Filling:
· 1 (3.4 oz) box Instant Vanilla Pudding Mix (not cook-and-serve)
· 1 (13.5 oz) can Full-Fat Coconut Milk, chilled (do not shake the can)
· 1 cup Cold Heavy Whipping Cream
· ½ cup Sweetened Shredded Coconut
· 1 teaspoon Coconut Extract
For the Stabilized Whipped Cream Frosting:
· 2 cups Cold Heavy Whipping Cream
· ½ cup Powdered Sugar, sifted
· 1 (3.4 oz) box Instant Vanilla Pudding Mix (this is the stabilizer secret!)
· 1 teaspoon Coconut Extract or clear vanilla extract
For the Assembly & Garnish:
· 1 ½ cups Sweetened Shredded Coconut, toasted
· To Toast Coconut: Spread on a baking sheet and bake at 350°F for 5-10 minutes, stirring frequently, until golden brown. Cool completely.
Step-by-Step Instructions: Crafting Your Masterpiece
Step 1: Bake the Cakes.
Preheat oven to temperature specified on cake mix box(usually 350°F). Grease and flour two 9-inch round cake pans, or line with parchment paper. In a large bowl, combine cake mix, eggs, milk, oil, and coconut extract. Beat with an electric mixer on medium speed for 2 minutes, scraping down the sides as needed. If using, fold in the ½ cup of finely processed shredded coconut. Divide batter evenly between the prepared pans. Bake for 23-28 minutes, or until a toothpick inserted in the center comes out clean. Let cakes cool in pans for 10 minutes, then turn out onto a wire rack to cool completely. Pro-Tip: For flat layers, wrap the warm cake layers tightly in plastic wrap and freeze for 1-2 hours. This makes them much easier to level and frost.
Step 2: Create the Coconut Cream Filling.
This step is best done while cakes cool.In a large bowl, whisk the instant vanilla pudding mix with the thick coconut cream from the TOP of the chilled can (about 1 cup of solid cream). Reserve the thinner coconut water for smoothies. Whisk until smooth. In a separate chilled bowl, beat the 1 cup of cold heavy cream with the coconut extract until stiff peaks form. Gently fold the whipped cream into the pudding mixture until no white streaks remain. Fold in the ½ cup of sweetened shredded coconut. Cover and refrigerate until firm, about 30 minutes.
Step 3: Whip the Stabilized Frosting.
In a completely clean,chilled large bowl, combine the 2 cups of cold heavy cream, sifted powdered sugar, the dry instant pudding mix, and coconut extract. Beat with an electric mixer on high speed until very stiff peaks form. This will happen quickly, in about 2-3 minutes. The pudding mix stabilizes the cream, preventing it from becoming runny. Cover and refrigerate until ready to use.
Step 4: Level, Fill, and Stack.
If your cake layers have domed tops,use a long serrated knife to carefully slice them off to create a flat surface. Place one cake layer on your serving plate or cake board. Spread the entire bowl of chilled coconut cream filling evenly over the top, leaving a small border around the edge. Carefully place the second cake layer on top, pressing down gently.
Step 5: Frost & Embellish.
Apply a thin“crumb coat” of the whipped cream frosting all over the cake. This initial layer seals in crumbs. Refrigerate for 15 minutes. Once set, apply the final, thick, and beautiful layer of frosting all over the top and sides of the cake, using an offset spatula to create swirls. Immediately press the toasted coconut onto the sides of the cake and sprinkle generously over the top. You can pipe remaining frosting around the top border if desired.
Step 6: Chill, Set, and Serve.
For the cleanest slices and best flavor,refrigerate the cake for at least 4 hours, or preferably overnight. Before serving, let it sit at room temperature for 15-20 minutes. Use a sharp knife, dipped in hot water and wiped dry, to slice.
Serving Suggestions: The Grand Finale
This cake is elegance itself.
· The Classic Slice: Serve on its own with a cup of coffee or tea.
· Tropical Accompaniment: Pair with fresh pineapple chunks, mango slices, or a drizzle of raspberry coulis for a vibrant contrast.
· Special Occasions: Adorn with fresh flowers (food-safe, like orchids), edible gold leaf, or white chocolate curls for a wedding or anniversary.
· Summer Party Star: It’s the perfect light yet indulgent finale to a grilling party or poolside gathering.
Pro Tips, Variations & Troubleshooting for Cake Success
· The Coconut Milk Secret: Do NOT shake the can. You need the thick, solid cream at the top for the filling. Place cans in the fridge the night before for best separation.
· Freeze for Flawless Frosting: Briefly freezing the cake layers is the single best tip for easy, crumb-free assembly with a soft filling.
· Toasting Coconut: Watch it like a hawk! It goes from golden to burnt in seconds. Stir frequently for even color.
· Customize Your Dream:
· Piña Colada Cake: Add ½ cup of crushed dried pineapple to the filling.
· Chocolate Coconut Dream: Use a chocolate cake mix and add a layer of chocolate ganache under the coconut filling.
· Gluten-Free: Use a certified gluten-free white cake mix.
· Adult Version: Brush the cake layers with a tablespoon of malibu rum or dark rum before adding the filling.
· Storage: Keep covered with a cake dome or in an airtight container in the refrigerator for up to 4 days. The stabilized frosting holds up beautifully.
Frequently Asked Questions (FAQ)
Q: Can I make this cake completely from scratch?
A:Absolutely. Substitute the box mix with your favorite white or vanilla cake recipe. Simply ensure you have about 6 cups of batter to divide between two 9-inch pans.
Q: My whipped cream frosting seems grainy from the pudding mix. What happened?
A:This can occur if you overbeat. Stop beating the second stiff peaks form. The powdered sugar should be sifted, and using the instant (not cook-and-serve) pudding is crucial. The graininess will often dissolve slightly upon chilling.
Q: Can I use Cool Whip instead of making the stabilized whipped cream?
A:You can, but the flavor and texture will be different. For the frosting, fold one 8 oz tub of thawed Cool Whip with ½ cup of powdered sugar and 1 tsp coconut extract. For the filling, fold the Cool Whip into the prepared pudding/coconut cream mixture.
Q: How do I transport this cake safely?
A:Chill it thoroughly first. Use a cake carrier or place the cake plate on a non-slip mat in a large box. Keep it cool with an ice pack tucked nearby, but not directly on the cake.
Conclusion: Dream No More—Bake and Celebrate
The Coconut Cream Dream Cake is more than a recipe; it’s a confidence-builder. It proves that breathtaking, bakery-quality desserts are within your reach, without requiring a pastry degree or an entire day in the kitchen. It’s a celebration of flavor, a testament to the power of a few smart tricks, and a guaranteed source of joy for anyone who tries it.
This cake doesn’t just satisfy a sweet tooth—it creates a moment. It’s the “ooh” and “aah” when you bring it to the table, the quiet contentment of the first bite, and the happy requests for “just one more sliver.” So, gather your ingredients, embrace the process, and get ready to make a dream come deliciously true.
We can’t wait to see your beautiful creation! When you make it, share your slice of paradise and tag it #CoconutCreamDreamCake. For more easy layer cake recipes and dessert inspiration, explore our full collection of sweet guides. Happy baking
More Recipes You Might Like
-

Cheesy Potato Patties 😋 – Crispy, Golden, and Irresistibly Cheesy If you’re looking for a high-RPM comfort food recipe that gets clicks, saves, and repeat cooks, Cheesy Potato Patties are a guaranteed winner. Crispy on the outside, soft and fluffy on the inside, and loaded with melty cheese—this recipe checks every box readers love: easy…
-

Brown Sugar Pineapple Ham Bake 😋 – The Ultimate Sweet & Savory Comfort Dish If you’re searching for a high-RPM, comfort-food recipe that people love clicking, saving, and cooking again and again, this Brown Sugar Pineapple Ham Bake is it. Sweet, sticky brown sugar. Juicy pineapple. Tender, savory ham. Baked together into one irresistible dish…
-

Angel Chicken Pasta – The Creamy Comfort Food That Everyone Loves
Few dishes feel as comforting, indulgent, and crowd-pleasing as Angel Chicken Pasta. This creamy, slow-cooked chicken pasta recipe has earned its name because it’s truly heavenly—rich, velvety sauce, tender chicken, and perfectly cooked pasta all coming together in one unforgettable meal. Angel Chicken Pasta is one of those recipes that never goes out of style.…