What happens when you take two of the most beloved baked goods of all time—the chewy, buttery chocolate chip cookie and the rich, fudgy brownie—and combine them into one epic dessert? You get Cookie Brownie Bars, the ultimate dessert hybrid that solves the age-old dilemma of “cookie or brownie?” by delivering both in every single bite.
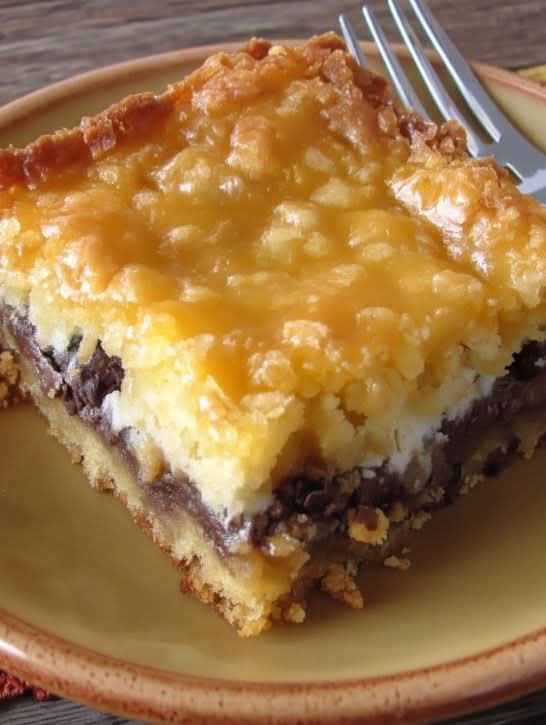
Imagine this: a dense, chocolatey brownie base topped with a layer of soft, gooey chocolate chip cookie dough, all baked together until the edges are crisp, the center is soft, and the chocolate chips are perfectly melted. This isn’t just a dessert; it’s a textural masterpiece and the undisputed king of potluck desserts.
Perfect for when you can’t decide, when you need to feed a crowd, or when you simply want to create the most crowd-pleasing treat imaginable, this recipe is your new secret weapon. It’s easier than baking two separate batches, more impressive than either alone, and guaranteed to be the first pan empty at any party, bake sale, or family gathering. Get ready to bake the most requested, most addictive bars of your life.
The Magic of the Mashup: Why This Recipe is a Game-Changer
Before we preheat the oven, let’s appreciate the sheer brilliance of this combination. It’s more than just stacking two recipes; it’s about creating a new, superior dessert experience.
The Textural Symphony: This is where the magic truly happens. The dense, fudgy base of the brownie provides a rich, chocolate foundation. The soft, chewy cookie top adds a buttery, vanilla-kissed layer with pockets of molten chocolate. The contrast between the two layers in every bite is nothing short of perfection.
The Flavor Harmony: The deep cocoa flavor of the brownie melds seamlessly with the brown sugar and vanilla notes of the cookie layer. Each element enhances the other, creating a more complex and satisfying flavor profile than either could achieve alone.
The Practical Genius: From a baking perspective, this is a one-pan wonder. You mix two simple batters, layer them, and bake. No rolling cookie dough, no slicing brownie squares from a sticky pan. It’s the ultimate easy dessert recipe for maximum impact with minimal fuss.
The Crowd-Pleasing Guarantee: It appeals to every dessert preference. Team Cookie and Team Brownie can finally unite in delicious harmony. This is the ultimate shareable dessert for any event, from game day spreads to holiday cookie swaps.
Gathering Your Ingredients: A Checklist for Perfection
Using quality ingredients ensures your bars are exceptional. Here’s your shopping list for the classic, unbeatable version.
For the Fudgy Brownie Layer:
· 1/2 cup (1 stick) unsalted butter, melted
· 1 cup granulated sugar
· 2 large eggs, at room temperature
· 1 teaspoon vanilla extract
· 1/3 cup unsweetened cocoa powder (Dutch-process or natural)
· 1/2 cup all-purpose flour
· 1/4 teaspoon salt
· 1/4 teaspoon baking powder
For the Chocolate Chip Cookie Layer:
· 1/2 cup (1 stick) unsalted butter, softened to room temperature
· 1/2 cup packed light brown sugar
· 1/4 cup granulated sugar
· 1 large egg, at room temperature
· 1 teaspoon vanilla extract
· 1 1/4 cups all-purpose flour
· 1/2 teaspoon baking soda
· 1/2 teaspoon salt
· 1 1/4 cups semi-sweet chocolate chips (plus more for topping)
This easy one-pan dessert is the ultimate crowd-pleasing recipe for potlucks and parties. It’s a make-ahead treat that’s perfect for holiday baking, birthday celebrations, and after-school snacks. As a family-friendly baking project, it’s both simple and incredibly satisfying.
Dietary Modification Spotlight:
· Gluten-Free: Substitute a 1:1 gluten-free flour blend for the all-purpose flour in both layers.
· Dairy-Free: Use plant-based butter sticks and ensure your chocolate chips are dairy-free.
· Nut-Free: This recipe is naturally nut-free, but always check chocolate chip labels.
· Lower-Sugar: Reduce the granulated sugar in the brownie layer by 1/4 cup and use sugar-free chocolate chips.
Essential Kitchen Tools You’ll Need
· 9×13 inch Baking Pan: The perfect size for thick, layered bars.
· Parchment Paper: For foolproof removal and clean slices.
· Two Medium Mixing Bowls: One for each layer.
· Hand Mixer or Stand Mixer: Helpful for the cookie layer, but a sturdy spatula and arm power will work.
· Whisk and Spatula
· Measuring Cups and Spoons
Step-by-Step Instructions: How to Build the Ultimate Layered Bar
Prep Time: 20 mins | Cook Time: 35-40 mins | Cooling Time: 2+ hours | Total Time: 3 hours | Servings: 24 generous bars
Step 1: Prep and Preheat
Preheat your oven to350°F (175°C). Line your 9×13 inch pan with parchment paper, leaving an overhang on two sides. This “sling” will let you lift the entire slab of bars out for perfect, crumb-free cutting. Lightly grease any exposed pan.
Step 2: Make the Brownie Layer (The Foundation)
In your first bowl,whisk the melted butter and granulated sugar together. Add the eggs and vanilla, whisking vigorously for 1-2 minutes until the mixture is smooth and slightly lighter in color. Sift in the cocoa powder, flour, salt, and baking powder. Use a spatula to fold until just combined and no dry streaks remain. The batter will be thick. Spread this batter evenly into the bottom of your prepared pan. It will be a thin layer; that’s perfect.
Step 3: Make the Cookie Layer (The Star Topping)
In your second bowl,use a hand mixer to cream the softened butter, brown sugar, and granulated sugar together until light and fluffy, about 2 minutes. Beat in the egg and vanilla until combined. In a separate small bowl, whisk together the flour, baking soda, and salt. Gradually add the dry ingredients to the wet, mixing on low speed until almost combined. Fold in the 1 1/4 cups of chocolate chips with a spatula.
Step 4: The Grand Assembly
Drop large,tablespoon-sized dollops of the cookie dough all over the top of the brownie batter layer. Using slightly damp fingers or a spatula, gently press and spread the cookie dough into an even layer, working to cover the brownie batter completely. Don’t worry if they mix slightly; it will bake together beautifully. Sprinkle a handful of extra chocolate chips over the top.
Step 5: Bake to Perfection
Bake for30-40 minutes. Start checking at 30 minutes. The bars are done when the top is golden brown, the edges are set, and a toothpick inserted into the center comes out with a few moist crumbs (not wet batter). The cookie layer may look slightly underdone in the very center, but it will set as it cools. Do not overbake.
Step 6: The Non-Negotiable Cool
This is the hardest but most important step.Place the pan on a wire rack and let the bars cool completely in the pan—at least 2 hours, but ideally 3-4. For the cleanest cuts and best texture, you can even refrigerate the pan for an hour after it reaches room temperature. The bars need time to set their structure.
Step 7: Slice and Serve
Using the parchment paper sling,lift the entire block of bars out of the pan and onto a cutting board. Use a sharp chef’s knife to slice into squares. For pristine cuts, wipe the knife clean between slices.
Pro Chef Tips & Common Mistakes to Avoid
· Room Temperature Ingredients are Key: This ensures proper emulsification and a smooth batter for both layers, especially the cookie dough.
· Don’t Skip the Parchment Sling: Trying to slice these rich, fudgy bars directly in the pan is a recipe for messy, broken squares.
· The Toothpick Test is a Guide: You want fudgy brownies, so a toothpick with a few crumbs is perfect. If it’s completely clean, you’ve likely overbaked.
· Patience During Cooling: Cutting into warm bars will cause them to fall apart and seem underbaked. The cooling time is when they finish setting.
· Common Mistake: Mixing the Batters Together. You want distinct layers, not a marbled effect. Layer them gently.
· Bar-Style Cookie Dough: This cookie layer is designed to be pressed, so it’s slightly drier than drop cookie dough. Don’t add extra liquid.
Creative Twists & Flavor Variations
The basic formula is a canvas for endless creativity:
Blonde Brownie Base: Substitute the chocolate brownie layer with a butterscotch or white chocolate blondie batter.
Peanut Butter Paradise: Swirl 1/2 cup of peanut butter into the brownie batter or add peanut butter chips to the cookie layer.
S’mores Style: Add 1 cup of crushed graham crackers to the cookie dough and top the baked bars with mini marshmallows. Broil for 30 seconds to toast.
Mint Chocolate Chip: Add 1/2 teaspoon peppermint extract to the cookie dough and use Andes mint pieces or dark chocolate chips.
Salted Caramel: Drizzle 1/2 cup of thick salted caramel sauce over the brownie layer before adding the cookie dough.
Double Chocolate Cookie: Replace 1/4 cup of the cookie layer’s flour with cocoa powder for an all-chocolate experience.
Serving Suggestions & Pairing Ideas
· The Classic: Serve the bars at room temperature with a tall glass of cold milk.
· A La Mode: Take them over the top by serving a square slightly warmed with a scoop of vanilla ice cream and a drizzle of chocolate sauce.
· For a Crowd: Stack them on a tiered stand for a dessert table or pack them in individual treat bags for a bake sale.
· Coffee Break: These are the perfect companion to an afternoon cup of coffee or espresso.
Storing, Freezing, and Reheating Instructions
· Storing: Keep bars in an airtight container at room temperature for 3-4 days, or in the refrigerator for up to a week. The fridge will make the brownie layer extra fudgy.
· Freezing: These bars freeze exceptionally well. Wrap individual squares or the whole block tightly in plastic wrap, then in foil or a freezer bag. Freeze for up to 3 months. Thaw at room temperature or overnight in the fridge.
· Reheating: To replicate a fresh-from-the-oven experience, microwave a square for 10-15 seconds or warm in a 300°F oven for 5 minutes.
Frequently Asked Questions (FAQ)
Q: Can I use boxed mixes to make this easier?
A: Absolutely!This is a fantastic shortcut. Prepare one box of brownie mix (for a 9×13 pan) and one pouch of chocolate chip cookie dough (like the break-and-bake kind or a 16.5 oz roll). Spread the brownie batter in the pan, then press pieces of the cookie dough on top. Bake as directed, adjusting time as needed.
Q: My cookie layer sank into the brownie layer. What happened?
A:This usually means your brownie batter was too thin or runny, or the cookie dough was too warm and soft. Ensure your brownie batter is thick and your cookie dough is the correct consistency (not overly greasy). Chilling the brownie layer for 15 minutes before adding the cookie dough can help.
Q: Can I make these in a 9×9 pan for thicker bars?
A:Yes, but you’ll need to adjust. You can use the full recipe for ultra-thick bars, but the bake time will increase significantly (by 15-25 minutes). Cover with foil if the top browns too quickly. Or, simply halve both recipes for a standard thickness in a 9×9 pan.
Q: Why are my bars cakey and not fudgy?
A:Overmixing the brownie batter (which incorporates air) or overbaking are the two main culprits. Mix until just combined and pull them from the oven as soon as the toothpick test indicates moist crumbs.
Q: Can I add nuts?
A:Of course! Fold 3/4 cup of chopped walnuts or pecans into either the brownie batter, the cookie dough, or both.
Conclusion: The Dessert That Ends All Debates
Cookie Brownie Bars are the ultimate peace treaty in the world of desserts. They are a celebration of indulgence, a testament to the fact that sometimes, more is more. This recipe delivers not just on flavor and texture, but on joy—the joy of baking something spectacularly simple, and the joy of watching it disappear to the sound of unanimous praise.
They prove that the best recipes are often the ones that bring our favorite things together in one unforgettable package. So, preheat your oven, clear your schedule for the essential cooling time, and prepare to bake your new signature treat.
Now, I’d love to hear from you: Are you Team Cookie, Team Brownie, or now forever Team Cookie Brownie Bar? What variation are you most excited to try? Share your creations and ideas in the comments below! And if this recipe becomes the hero of your next gathering, please share it with a friend and pin it for your next baking day.
More Recipes You Might Like
-

Cheesy Potato Patties 😋 – Crispy, Golden, and Irresistibly Cheesy If you’re looking for a high-RPM comfort food recipe that gets clicks, saves, and repeat cooks, Cheesy Potato Patties are a guaranteed winner. Crispy on the outside, soft and fluffy on the inside, and loaded with melty cheese—this recipe checks every box readers love: easy…
-

Brown Sugar Pineapple Ham Bake 😋 – The Ultimate Sweet & Savory Comfort Dish If you’re searching for a high-RPM, comfort-food recipe that people love clicking, saving, and cooking again and again, this Brown Sugar Pineapple Ham Bake is it. Sweet, sticky brown sugar. Juicy pineapple. Tender, savory ham. Baked together into one irresistible dish…
-

Angel Chicken Pasta – The Creamy Comfort Food That Everyone Loves
Few dishes feel as comforting, indulgent, and crowd-pleasing as Angel Chicken Pasta. This creamy, slow-cooked chicken pasta recipe has earned its name because it’s truly heavenly—rich, velvety sauce, tender chicken, and perfectly cooked pasta all coming together in one unforgettable meal. Angel Chicken Pasta is one of those recipes that never goes out of style.…