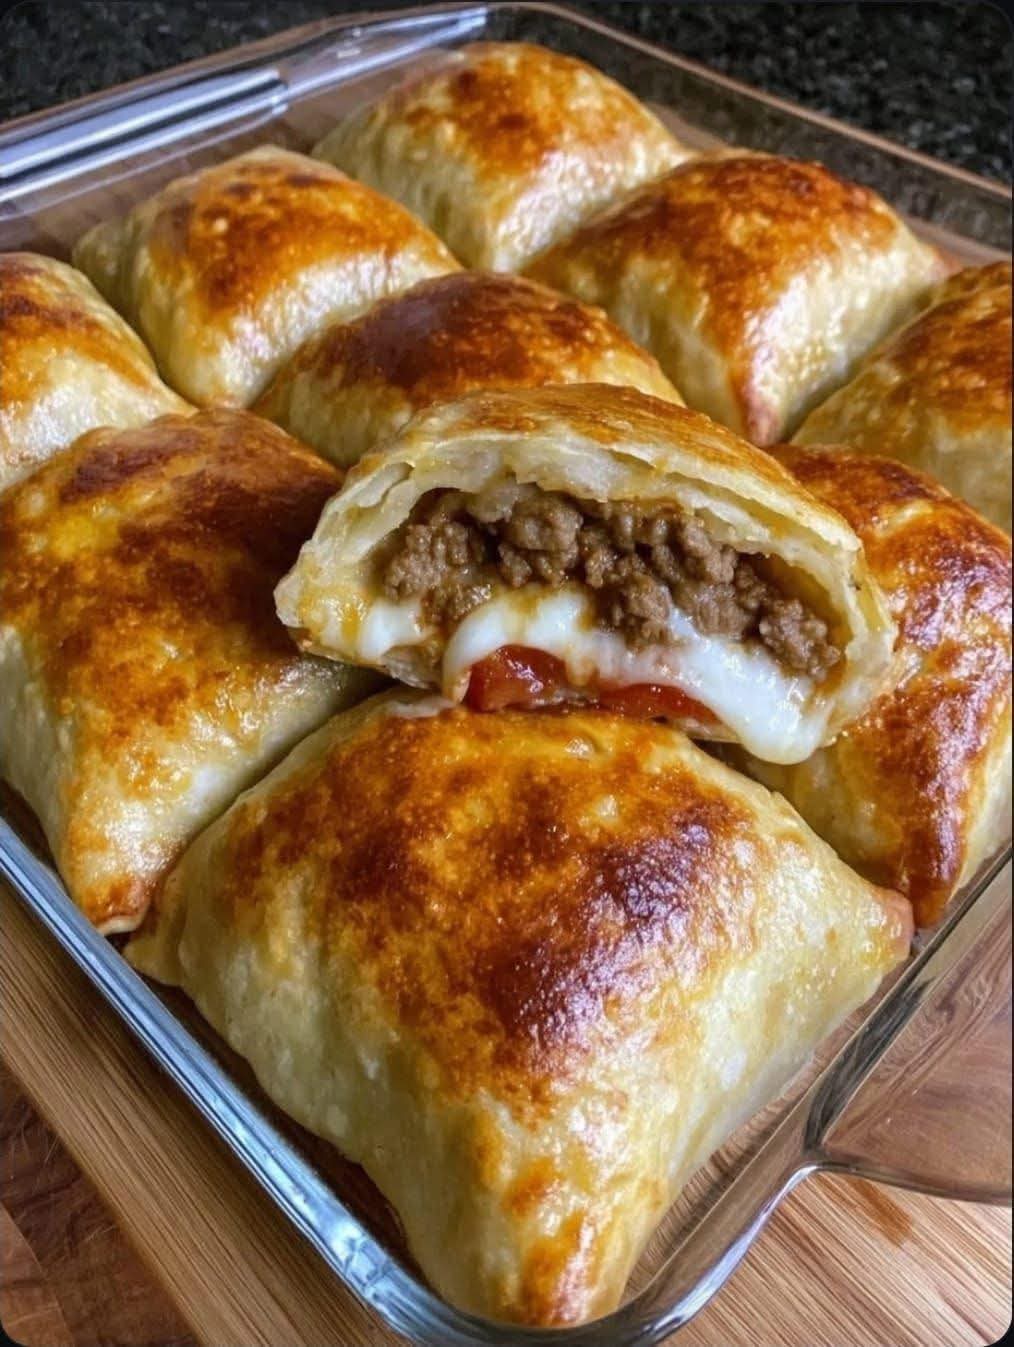
Imagine the bold, crave-worthy flavors of your favorite fully-loaded taco—seasoned ground beef, melty cheese, crisp lettuce, and cool sour cream—all securely wrapped in a warm, golden-brown, buttery pastry pocket you can eat with your hands. This is the genius of Loaded Cheesy Pocket Tacos: a fun, family-friendly dinner that solves the messiness of traditional tacos while delivering an explosion of flavor in every portable bite. They’re the perfect hybrid—a crowd-pleasing appetizer for game day, a brilliant lunchbox surprise, and a make-ahead freezer meal that turns an ordinary Tuesday into a celebration.
This recipe is a masterclass in balance and convenience. By using a simple, seasoned beef and bean filling and the flaky magic of store-bought crescent dough, you create a dish that’s infinitely customizable, deceptively easy, and guaranteed to disappear fast. Whether you bake a batch for a party or keep them frozen for emergency dinners, these pocket tacos are your secret weapon for delivering joy, one delicious, cheesy parcel at a time. Let’s fold up a fiesta!
Why This Recipe is a Guaranteed Hit
This recipe earns its place in your regular rotation by combining universal appeal with smart, practical cooking.
· The Ultimate Mess-Free Taco: All the flavor, zero spillage. The sturdy pastry pocket contains the juicy filling and toppings, making it perfect for kids, parties, and eating on the go.
· Customizable for Every Palate: Set up a “pocket bar” with different fillings (chicken, pork, black beans) and let everyone build their own. It’s an interactive, fun dinner.
· Meal Prep & Freezer Champion: Assemble a double batch and freeze unbaked. You’ll have a homemade hot pocket superior to anything store-bought, ready to bake straight from the freezer.
· Uses Simple Shortcuts: With pre-made crescent dough and a straightforward stovetop filling, this is a 30-minute meal that tastes like you spent hours.
· Crowd-Feeding Efficiency: One batch makes 8 generous pockets, easily scalable for a crowd. They’re the perfect potluck or game day finger food.
The Anatomy of a Perfect Pocket: Ingredient Deep Dive
The magic is in the harmony of a well-seasoned, moist-but-not-wet filling and a perfectly baked, flaky crust.
Part 1: The Flavor-Packed Filling
The filling must be flavorful and cohesive, not dry or runny.
Ground Beef (1 lb, 80/20 blend): The classic base. The fat adds flavor and moisture. For a leaner option, use ground turkey or chicken, but add a touch more oil.
Taco Seasoning (1 packet or 2 tbsp homemade): The flavor engine. A homemade blend of chili powder, cumin, garlic powder, onion powder, paprika, and oregano gives you control over salt and heat.
Tomato Paste (1 tbsp) & Beef Broth (¼ cup): The secret to a rich, saucy (not soupy) filling. The tomato paste adds umami depth, and the broth deglazes the pan, creating a cohesive sauce that clings to the meat.
Refried Beans (½ cup): The unsung hero. They act as a binder, add creaminess, stretch the filling, and ensure every bite is moist. Use traditional or black bean refried beans.
Diced Green Chiles (1 small can, 4 oz): Provide a subtle, authentic kick and tang without overwhelming heat. Do not drain.
Part 2: The Cheesy, Crispy Vessel
Crescent Roll Dough (2 cans, 8 oz each): The perfect, buttery, flaky wrapper. Seamlessly perforated dough sheets work best for easy sealing. Keep them refrigerated until the moment you use them.
The Cheese Blend (2 cups): Use a mix for maximum melt and flavor.
· Sharp Cheddar: For punch.
· Monterey Jack or Pepper Jack: For superior melt and a hint of spice.
· Always shred from a block. Pre-shredded cheese contains anti-caking agents that can make the filling grainy and hinder melting.
Part 3: The “Loaded” Toppings (Added After Baking)
These fresh elements provide the crucial contrast.
· Shredded Lettuce, Diced Tomato, Sliced Jalapeños, Fresh Cilantro
· Cooling Drizzles: Sour Cream Thinned with a little milk or lime juice, and Salsa.
Step-by-Step Guide to Leak-Proof, Flaky Pockets
Follow this sequence for perfectly sealed, golden-brown pockets every time.
Phase 1: Cook the Filling & Cool Completely
Brown the Beef: In a skillet over medium-high heat, cook the ground beef until no longer pink. Drain excess fat if desired.
Build Flavor: Add taco seasoning and tomato paste; cook for 1 minute until fragrant. Pour in beef broth to deglaze the pan, scraping up browned bits.
Combine & Thicken: Stir in refried beans and undrained green chiles. Cook for 3-5 minutes until the mixture is thick and holds together. Transfer to a bowl and let cool for 15 minutes. A hot filling will melt the dough and cause leaks. Stir in 1 cup of the shredded cheese once slightly cooled.
Phase 2: Assemble & Seal (The Key to Success)
Prep Dough: Preheat oven to 375°F (190°C). Line a baking sheet with parchment paper. Unroll the crescent dough sheets. If using perforated triangles, press the perforations together to form 4 solid rectangles per sheet (8 total).
Fill & Fold: Place a rectangle on your work surface. Spoon 3-4 tablespoons of the cooled filling onto the center. Top with a sprinkle of the remaining cheese.
Create the Pocket: Fold the dough over the filling to create a rectangle or triangle pocket. Use a fork to firmly crimp and seal all three open edges. This step is non-negotiable for preventing bursts.
Egg Wash & Vent: Place sealed pockets on the baking sheet. For a golden shine, brush the tops lightly with a beaten egg. Use a sharp knife to cut 2-3 small slits in the top of each pocket to allow steam to escape.
Phase 3: Bake to Golden Perfection
Bake: Bake for 12-15 minutes, or until the pockets are puffed and a deep, golden brown.
Cool Slightly: Let them cool on the baking sheet for 5 minutes. They will be molten hot inside.
Phase 4: The “Loaded” Finish
Top & Serve: Carefully slice open the top of each pocket (or serve whole). Load them up with shredded lettuce, diced tomato, a drizzle of thinned sour cream and salsa, and a sprinkle of fresh cilantro and jalapeños. Serve immediately.
5 Flavor-Packed Variations to Explore
Master the base, then take a trip around the flavor map:
Buffalo Chicken Pocket Tacos: Use shredded cooked chicken tossed in buffalo sauce. Fill with a mix of Monterey Jack and blue cheese crumbles. Drizzle with ranch after baking.
Breakfast Pocket Tacos: Fill with scrambled eggs, cooked breakfast sausage, and cheddar cheese. Serve with a side of salsa for dipping.
BBQ Pulled Pork Pockets: Use leftover or store-bought pulled pork mixed with your favorite BBQ sauce. Coleslaw is the perfect topping.
Spicy Black Bean & Corn (Vegetarian): Sauté black beans, corn, bell peppers, and onions with taco seasoning. Use pepper jack cheese.
Taco Bell®-Style “Crunchwrap” Pocket: Add a small handful of broken tortilla chips to the beef filling before sealing for an iconic crunch.
Serving, Storage, and Freezer Mastery
This recipe’s practicality is its superpower.
· Serving: Serve as a main course with Mexican rice and black beans or a simple side salad. For parties, slice them in half and arrange on a platter.
· Storage: Store cooled, unfilled pockets in the fridge for up to 3 days. Reheat in the oven or air fryer to restore crispness. Add fresh toppings after reheating.
· Freezing (Unbaked): Assemble pockets, place on a parchment-lined tray, and freeze solid. Transfer to a freezer bag. Bake from frozen, adding 5-7 minutes to the bake time. They keep for 3 months.
· Reheating Cooked Pockets: Re-crisp in a 350°F (175°C) oven or air fryer for 8-10 minutes. The microwave will make the pastry soggy.
Frequently Asked Questions (FAQ)
Q: Can I use puff pastry instead of crescent dough?
A:Yes, but the result will be richer and flakier. Thaw one sheet of puff pastry, cut into 4 squares, fill, fold, and seal. Bake at 400°F for 18-22 minutes.
Q: My pockets burst open in the oven. What happened?
A:The filling was likely too warm when assembled, you overfilled them, or you didn’t seal the edges tightly enough with the fork. Ensure filling is cool, use the recommended amount, and crimp firmly.
Q: Can I make these in an air fryer?
A: Absolutely!Air fry at 370°F (190°C) for 8-10 minutes, flipping halfway, until golden brown. Cook in batches to avoid overcrowding.
Q: What’s the best way to reheat leftovers?
A:The air fryer is the champion for restoring crispness (3-4 mins at 370°F). The oven (10 mins at 350°F) works well too. Always add fresh toppings after reheating.
Q: Can I make these ahead for a party?
A: Perfectly.Assemble the unbaked pockets, cover, and refrigerate for up to 24 hours. Bake as directed, adding 1-2 minutes. Or, freeze unbaked and bake from frozen when needed.
Conclusion: Your New Go-To for Fun, Flavorful Meals
Loaded Cheesy Pocket Tacos are more than a clever recipe—they are a strategy for happy, hassle-free eating. They represent the joy of fusion cooking, the wisdom of the make-ahead meal, and the universal truth that everything is better wrapped in a warm, flaky, buttery crust. By mastering this one versatile technique, you gain a dish that delights kids, impresses guests, and saves your sanity on busy nights.
Now, get folding and baking! What delicious variation did you create? Did you achieve the perfect golden seal? Share your handheld fiesta and tag your photos #MyPocketTaco. And when you’re ready for another fun, stuffed pastry, try our Philly Cheesesteak Egg Rolls—they bring the same crispy, savory, crowd-pleasing energy.
Loaded Cheesy Pocket Tacos
Prep Time: 20 mins | Cook Time: 15 mins | Total Time: 35 mins | Yield: 8 pockets
Course: Main Course, Appetizer | Cuisine: Tex-Mex, American
Keywords: loaded cheesy pocket tacos, crescent roll tacos, easy handheld tacos, make ahead freezer meal, family dinner, game day food, ground beef recipe, kid friendly dinner, party appetizers
Description: All the flavors of a loaded taco wrapped in a flaky, buttery crescent dough pocket! Filled with seasoned beef, beans, cheese, and topped with fresh lettuce, tomato, and cool sauces. The ultimate fun, mess-free meal.
Ingredients:
For the Filling:
· 1 lb ground beef (80/20)
· 1 packet (or 2 tbsp) taco seasoning
· 1 tbsp tomato paste
· ¼ cup beef broth
· ½ cup refried beans
· 1 can (4 oz) diced green chiles, undrained
· 2 cups shredded cheese blend (cheddar & Monterey Jack), divided
For Assembly & Topping:
· 2 cans (8 oz each) crescent roll sheets or seamless dough
· 1 egg, beaten (for egg wash)
· Shredded lettuce, diced tomato, sour cream (thinned), salsa, cilantro, jalapeños
Instructions:
- Filling: Brown beef in skillet; drain if needed. Add taco seasoning and tomato paste; cook 1 min. Stir in broth, beans, and chiles. Cook 3-5 mins until thick. Cool 15 mins. Stir in 1 cup cheese.
- Assemble: Preheat oven to 375°F. Unroll dough; press perforations to form 8 rectangles. Place 3-4 tbsp filling and a cheese sprinkle on each. Fold dough over, seal edges with a fork. Cut slits in top, brush with egg wash.
- Bake: Bake 12-15 mins until golden brown. Cool 5 mins.
- Load & Serve: Open pockets slightly, load with lettuce, tomato, drizzles of sour cream & salsa, cilantro, and jalapeños. Serve immediately.
Notes:
· Cool Filling: Prevents soggy dough and leaks.
· Seal Tightly: The fork crimp is essential.
· Freeze Unbaked: Freeze shaped pockets on a tray, then bag. Bake from frozen, adding 5-7 mins.
· Air Fryer Method: Cook at 370°F for 8-10 mins, flipping halfway.
· Customize: Use ground turkey, chicken, or a veggie bean mix.
More Recipes You Might Like
-

Cheesy Potato Patties 😋 – Crispy, Golden, and Irresistibly Cheesy If you’re looking for a high-RPM comfort food recipe that gets clicks, saves, and repeat cooks, Cheesy Potato Patties are a guaranteed winner. Crispy on the outside, soft and fluffy on the inside, and loaded with melty cheese—this recipe checks every box readers love: easy…
-

Brown Sugar Pineapple Ham Bake 😋 – The Ultimate Sweet & Savory Comfort Dish If you’re searching for a high-RPM, comfort-food recipe that people love clicking, saving, and cooking again and again, this Brown Sugar Pineapple Ham Bake is it. Sweet, sticky brown sugar. Juicy pineapple. Tender, savory ham. Baked together into one irresistible dish…
-

Angel Chicken Pasta – The Creamy Comfort Food That Everyone Loves
Few dishes feel as comforting, indulgent, and crowd-pleasing as Angel Chicken Pasta. This creamy, slow-cooked chicken pasta recipe has earned its name because it’s truly heavenly—rich, velvety sauce, tender chicken, and perfectly cooked pasta all coming together in one unforgettable meal. Angel Chicken Pasta is one of those recipes that never goes out of style.…