Discover Cocada con Leche Condensada! This easy, creamy Latin American coconut candy is made with just 3 ingredients. No bake, no fuss—the perfect sweet treat for any occasion.
Close your eyes and imagine the taste of the tropics. Not a complex, layered pastry, but something pure, sweet, and profoundly satisfying. The deep, toasty aroma of coconut, the rich, caramelized sweetness of milk, and a texture that’s both chewy and tender, all melting on your tongue. This is the magic of Cocada con Leche Condensada—a classic Latin American confection that transforms the humblest of ingredients into a treat that feels like a celebration.
In a world of complicated desserts, Cocada stands as a monument to minimalist brilliance. With just three core ingredients and one pan, you can create a candy that is universally adored. It’s the easy, no-bake dessert you whip up when a sweet craving strikes, the crowd-pleasing treat you bring to potlucks that always disappears first, and the simple homemade candy that connects you to generations of tradition across Mexico, Colombia, Brazil, and beyond.
Whether you’re looking for a gluten-free and dairy-free dessert option (it’s naturally both!), a last-minute sweet to satisfy guests, or a fun, kid-friendly cooking project, this recipe is your answer. It’s forgiving, fast, and delivers a payoff that’s infinitely greater than the effort required. Let’s explore the simple art of making this iconic coconut candy.
Why Cocada is the Ultimate Minimalist Dessert
This recipe earns its place in your repertoire through sheer reliability, versatility, and the powerful nostalgia it evokes.
· The 3-Ingredient Miracle: Shredded coconut, sweetened condensed milk, and a pinch of salt. That’s it. These pantry staples come together in a alchemical reaction to create something far greater than the sum of its parts. It’s the very definition of a backup plan dessert.
· No-Bake, One-Pan Simplicity: There’s no oven to preheat, no delicate techniques to master. The entire process happens in a single saucepan or skillet over gentle heat. In under 30 minutes, you have a finished treat. It’s the ultimate stress-free cooking.
· Textural Paradise: The finished Cocada can be tailored to your desire. Cook it less for a soft, moist, almost macaroon-like consistency. Cook it longer for a firmer, chewier, caramelized candy perfect for cutting into squares. This control is in your hands.
· A Canvas for Creativity: While the classic is perfect, it’s also a wonderful base. Add a teaspoon of cinnamon, a splash of vanilla or rum extract, a handful of toasted nuts, or a drizzle of dark chocolate after cooling. It’s a customizable sweet treat.
· Naturally Allergy-Friendly: It’s inherently gluten-free, grain-free, and can easily be made dairy-free by using coconut condensed milk. This makes it a safe and delicious option for sharing with friends who have dietary restrictions.
Gathering Your Simple, Powerful Ingredients
The short list belies the complex flavor you’ll achieve. Quality matters, especially with the coconut.
The Core Trinity:
· 1 (14 oz / 400g) can sweetened condensed milk: The glue and the sweetener. Do not use evaporated milk.
· 3 cups (about 240g) unsweetened shredded coconut or coconut flakes: This is critical. Unsweetened coconut allows you to control the sweetness. Fine shredded coconut gives a tighter, more traditional texture; larger flakes offer a chewier, more rustic bite. For the best flavor, use toasted coconut or toast it yourself (see Pro Tips).
· ⅛ teaspoon fine sea salt: To balance the intense sweetness and enhance the coconut flavor.
Optional Flavor Enhancers:
· 1 teaspoon pure vanilla extract
· ½ teaspoon ground cinnamon
· Zest of one lime or orange
· 1 tablespoon unsalted butter: Added at the end for extra richness and shine.
For Serving & Presentation:
· Powdered sugar, for dusting
· Extra shredded coconut, for rolling
Ingredient Spotlight: The Coconut Choice
· Unsweetened vs. Sweetened: Using unsweetened coconut is non-negotiable for this recipe. Sweetened condensed milk provides all the sweetness needed. Sweetened coconut would make the final product cloying.
· Shredded vs. Flaked: Fine, unsweetened shredded coconut will give you a denser, more uniform candy, similar to a firm macaroon. Unsweetened coconut flakes (chopped or left whole) provide more texture and a chewier mouthfeel. Both are excellent.
· Toasting is a Game-Changer: While you can use coconut straight from the bag, toasting it first in a dry skillet or oven until golden brown unlocks a deep, nutty flavor that elevates the Cocada from great to extraordinary.
Step-by-Step Instructions: The Simple Alchemy
The process is straightforward, but attention during cooking is key to achieving your desired texture.
Step 1: Toast the Coconut (Highly Recommended).
In a large,dry skillet or saucepan, add the shredded coconut. Toast over medium-low heat, stirring constantly, for 3-5 minutes until it turns a fragrant, light golden brown. Watch it closely—it can burn quickly. Transfer to a bowl immediately to stop the cooking.
Step 2: Combine and Cook.
In the same skillet(no need to wash it), pour in the entire can of sweetened condensed milk. Add the salt and any optional flavorings (vanilla, cinnamon, zest). Heat over medium-low heat, stirring constantly with a wooden spoon or silicone spatula.
Once the mixture is warm and fluid, add all of the toasted coconut. Stir vigorously until every strand of coconut is completely coated in the condensed milk.
Step 3: The Critical Cooking Phase.
Continue to cook over medium-low heat,stirring constantly. The mixture will first be loose and wet. As the moisture evaporates, it will thicken dramatically. After 8-12 minutes, it will begin to pull away from the sides of the pan as you stir, and the bottom of the pan will become visible for a second before the mixture slides back. This is your cue.
· For Soft, Moist Cocada (like a macaroon): Cook until the mixture just begins to pull away from the pan. It will still be somewhat sticky but will hold a shape when pressed.
· For Firmer, Chewy Candy Squares: Cook for 1-3 minutes longer, until the mixture forms a more cohesive mass and the pan stays clean for a few seconds when you scrape it.
Step 4: Shape and Cool.
Immediately transfer the hot coconut mixture to a preparation surface:
· For Dropped Candies/Bites: Line a baking sheet with parchment paper. Using two spoons or a small cookie scoop, drop rounded tablespoons of the mixture onto the sheet. Let cool completely.
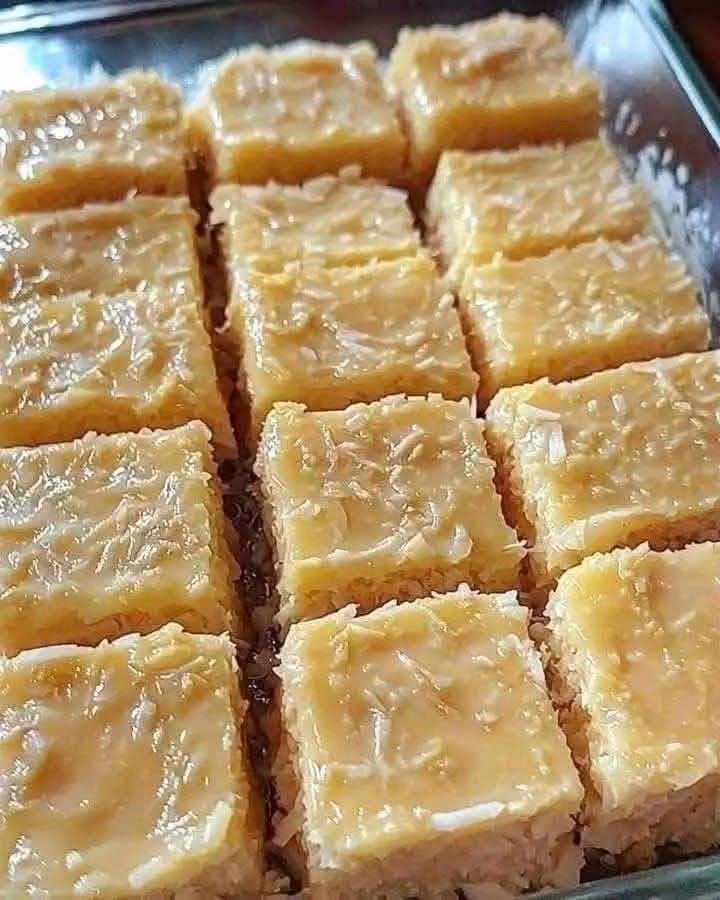
· For Squares/Bars: Line an 8×8 inch baking pan with parchment paper. Press the hot mixture firmly and evenly into the pan using the back of a spoon or a small piece of parchment paper. Let cool completely, then lift out using the parchment and cut into squares.
Step 5: The Final Touch (Optional).
Once completely cool,you can roll the bites or squares in a little extra shredded coconut or dust them lightly with powdered sugar for a beautiful finish.
Pro Secrets: Tips for the Perfect Cocada Every Time
· Stir, Don’t Stop: Constant stirring is the secret to preventing burning and ensuring even cooking. This is a meditative, hands-on process.
· The “Ball” Test: To check for the firmer stage, take a small spoonful of the mixture and drop it into a glass of ice water. If it holds together in a soft ball, it’s ready. If it dissolves, cook a bit longer.
· Butter for Shine and Release: Adding a tablespoon of butter right at the end of cooking not only adds a lovely richness but also makes the mixture less sticky and easier to handle when shaping.
· Troubleshooting Sticky Cocada: If your finished candies are too sticky after cooling, you likely didn’t cook the mixture long enough. You can fix it! Simply return the mixture to the pan and cook for another 2-3 minutes, stirring constantly.
· Make it Dairy-Free/Vegan: Use a high-quality coconut sweetened condensed milk (available in most health food stores or online). The flavor is incredible and makes the dessert fully plant-based.
Serving Suggestions & Cultural Traditions
Cocada is enjoyed in countless ways across Latin America.
· The Simple Sweet: Serve the bites or squares on a platter as a casual candy with coffee or tea.
· As a Dessert Topping: Crumble soft Cocada over vanilla ice cream, flan, or fruit salad.
· Fancy Presentation: For a party, insert a lollipop stick into each warm, dropped portion to make Cocada Pops. Drizzle with melted chocolate once cool.
· The Colombian Style (“Cocada Horneada”): Press the mixture into a pie plate and bake at 350°F for 15-20 minutes until the top is golden for a firmer, cake-like texture.
FAQs: Your Cocada Questions, Answered
Q: My Cocada is too hard/crunchy. What went wrong?
A:This means it was cooked for too long. The condensed milk sugars over-caramelized. Next time, reduce the cooking time significantly and look for the “pull away from the pan” sign sooner. For salvage, you can chop it up and use it as a crunchy topping for yogurt or ice cream.
Q: Can I use desiccated coconut?
A:Yes, desiccated coconut (a very fine, dry grind) will work, but the texture will be denser and less chewy. You may need to reduce the cooking time by a minute or two as it absorbs liquid differently.
Q: How do I store Cocada, and how long does it last?
A:Store in an airtight container at room temperature for up to 5 days, or in the refrigerator for up to 2 weeks. The texture firms up when chilled. It does not freeze well, as the condensed milk can become grainy.
Q: Can I add other ingredients?
A: Absolutely!After removing from heat, you can stir in ½ cup of chopped toasted pecans, almonds, or walnuts, ½ cup of dried fruit (chopped raisins, apricots), or ½ cup of chocolate chips.
A Final, Sweet Bite of Tradition
Cocada con Leche Condensada is more than a recipe; it’s a delicious lesson in resourcefulness. It proves that deep, satisfying flavor doesn’t require complexity or expense. It’s a treat that crosses borders, evoking sunny beaches, bustling market stalls, and home kitchens filled with love.
Making it is an act of connection—to a rich culinary heritage and to the simple joy of creating something wonderful with your own hands. As you stir that fragrant, golden mixture and shape it into sweet morsels, you’re participating in a tradition shared by millions.
So, open that can of condensed milk, toast that coconut, and prepare for the simplest, most satisfying dessert adventure. One bite of this creamy, chewy, coconutty bliss, and you’ll understand why it’s been beloved for generations.
Did you make this traditional treat? Share your creations! Tag your photos on social media with #CocadaCasera. We love seeing your sweet traditions! Don’t forget to save this recipe to your “Global Desserts” and “Easy Sweets” boards.
Prep Time: 5 mins | Cook Time: 15 mins | Cooling Time: 1 hour | Total Time: 1 hour 20 mins | Category: Dessert, Candy | Cuisine: Latin American | Yield: 24-30 pieces
Nutritional Information (Per piece, estimated): Calories: 90, Fat: 5g, Saturated Fat: 4g, Carbohydrates: 10g, Fiber: 1g, Sugar: 9g, Protein: 1g
More Recipes You Might Like
-

Cheesy Potato Patties 😋 – Crispy, Golden, and Irresistibly Cheesy If you’re looking for a high-RPM comfort food recipe that gets clicks, saves, and repeat cooks, Cheesy Potato Patties are a guaranteed winner. Crispy on the outside, soft and fluffy on the inside, and loaded with melty cheese—this recipe checks every box readers love: easy…
-

Brown Sugar Pineapple Ham Bake 😋 – The Ultimate Sweet & Savory Comfort Dish If you’re searching for a high-RPM, comfort-food recipe that people love clicking, saving, and cooking again and again, this Brown Sugar Pineapple Ham Bake is it. Sweet, sticky brown sugar. Juicy pineapple. Tender, savory ham. Baked together into one irresistible dish…
-

Angel Chicken Pasta – The Creamy Comfort Food That Everyone Loves
Few dishes feel as comforting, indulgent, and crowd-pleasing as Angel Chicken Pasta. This creamy, slow-cooked chicken pasta recipe has earned its name because it’s truly heavenly—rich, velvety sauce, tender chicken, and perfectly cooked pasta all coming together in one unforgettable meal. Angel Chicken Pasta is one of those recipes that never goes out of style.…